Spring Flowers Inspired Makeup Tutorial - Anemone EOTD

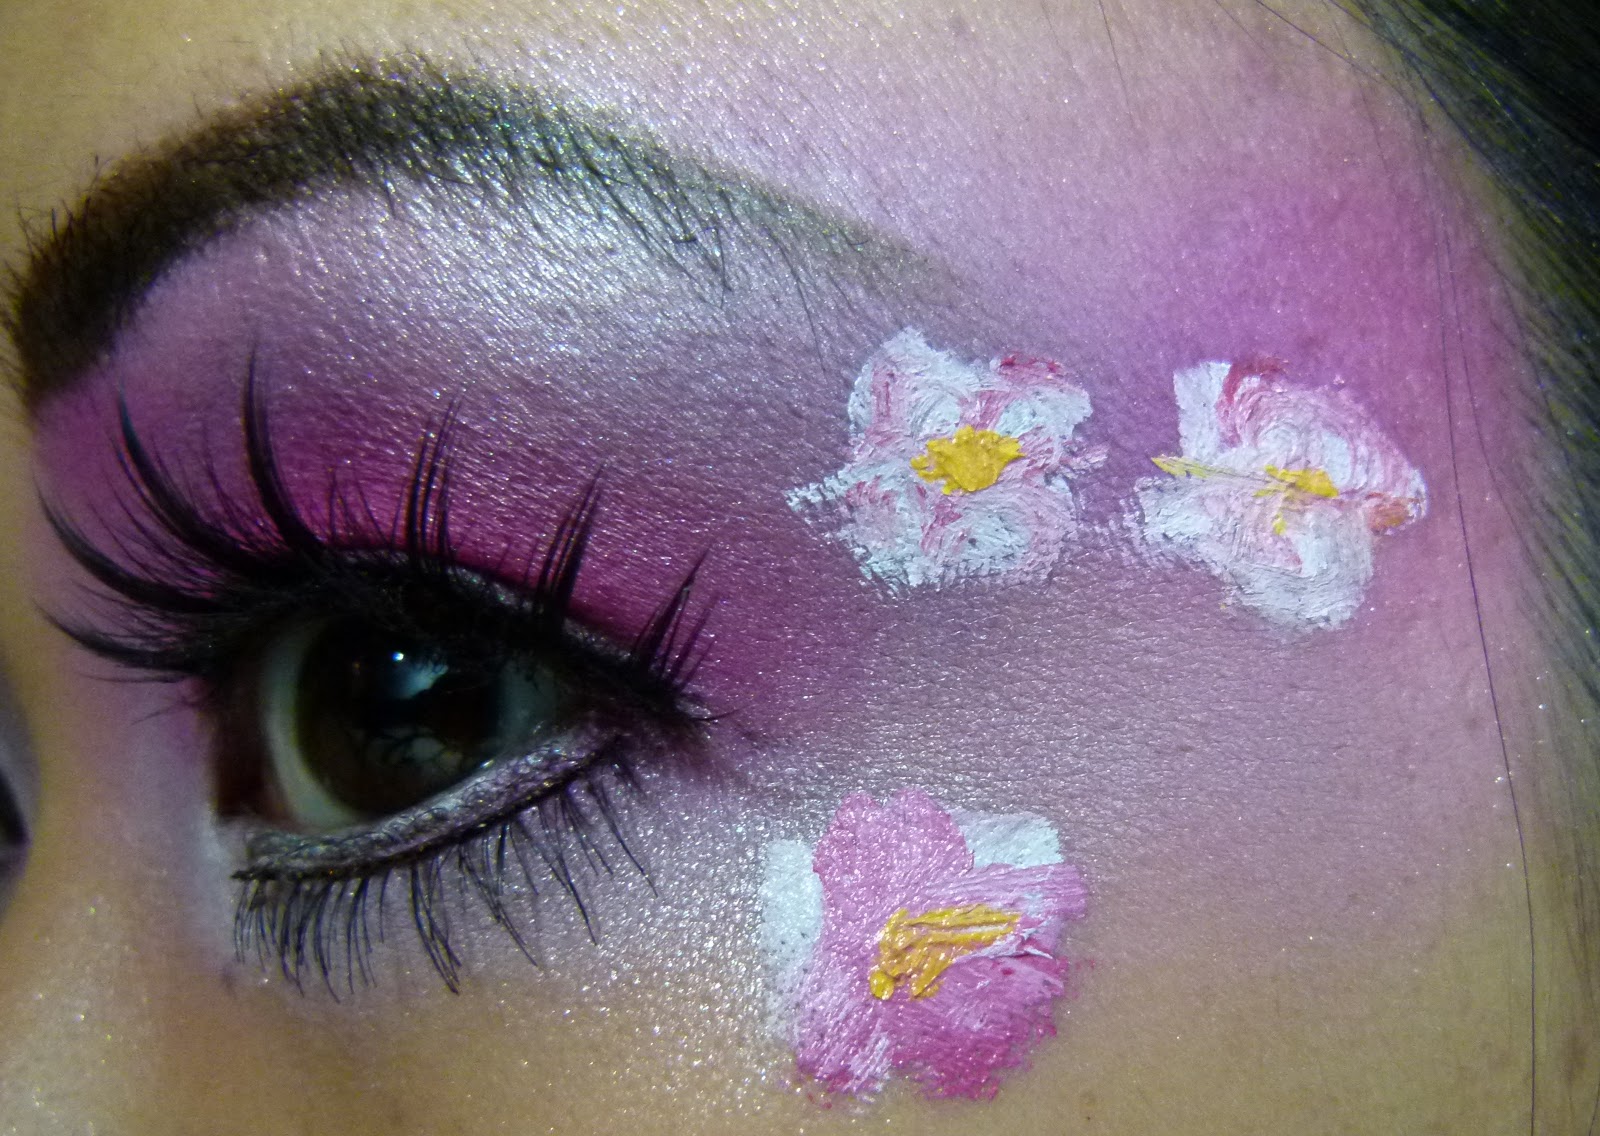
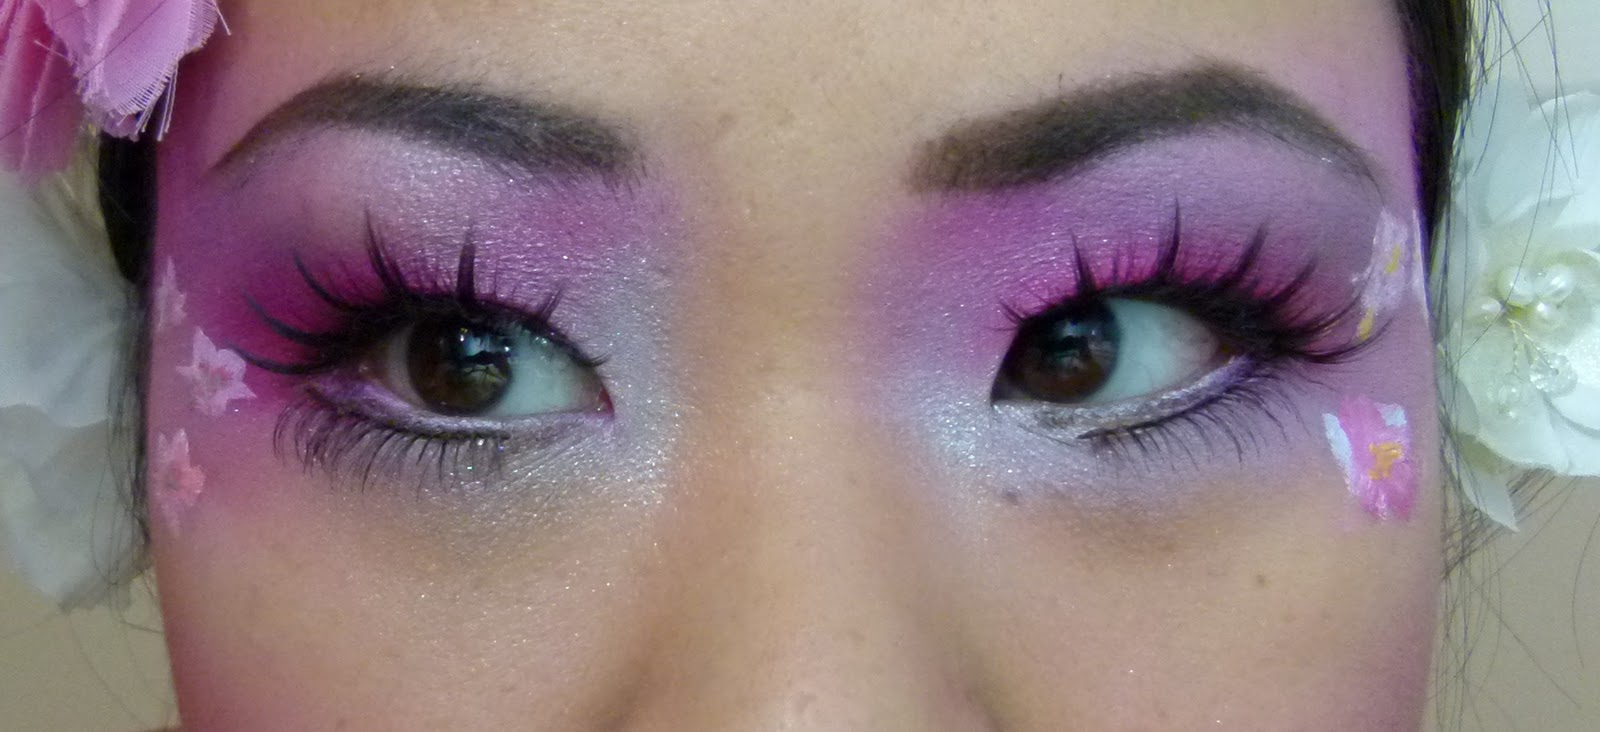
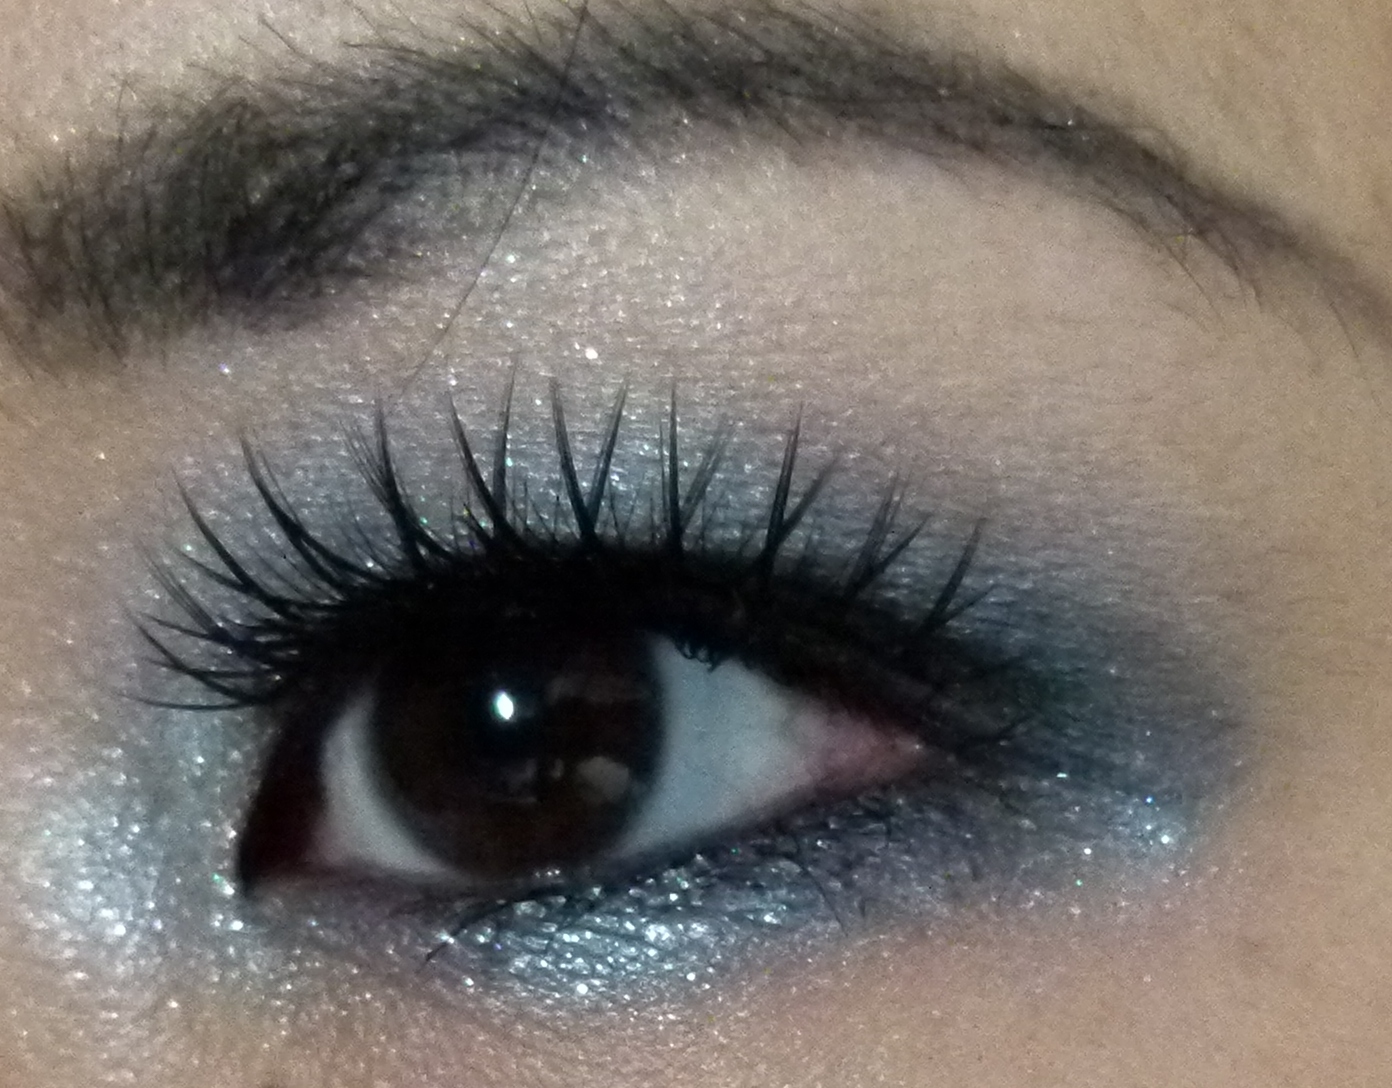
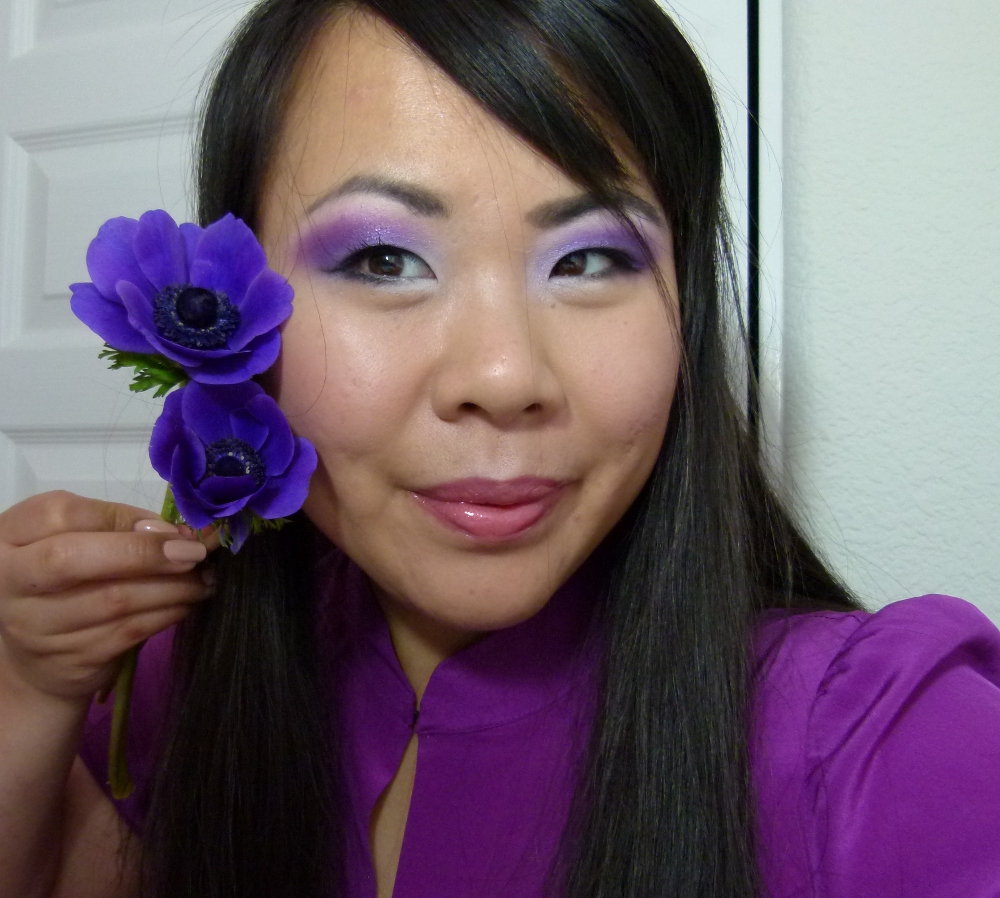
 My Anemone inspired look.
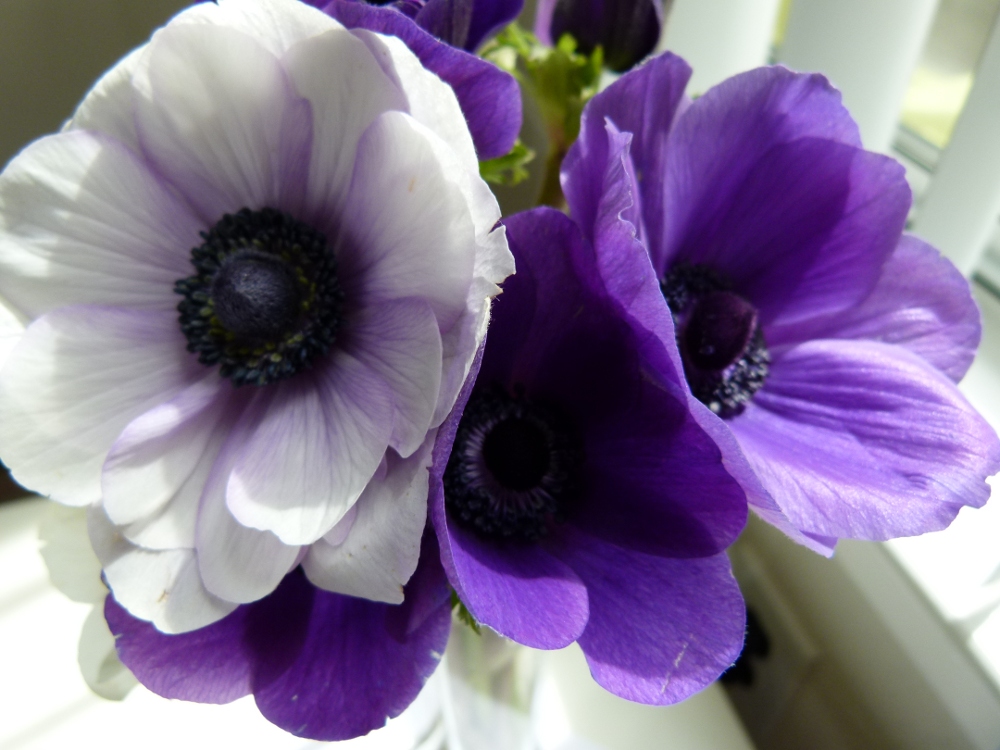
 Did you know there are more than 150+ species of Anemone!?

Hi everyone!  Happy Monday!  It rained most of last week here, and I'm itching for sunny weather.  I decided to post this spring flower inspired makeup tutorial to brighten my day (and hopefully yours too).  Anemone are such beautiful flowers.  I love how they have so much variation in size, style, color.  I also love how they are so simple in composition but can have intricate differences in shades.  While researching for this tutorial, I had a hard time deciding on what color to pick because there are so many.  My local farmers market has some of the best flowers, and it was almost impossible to pick only one bunch of these gorgeous flowers.
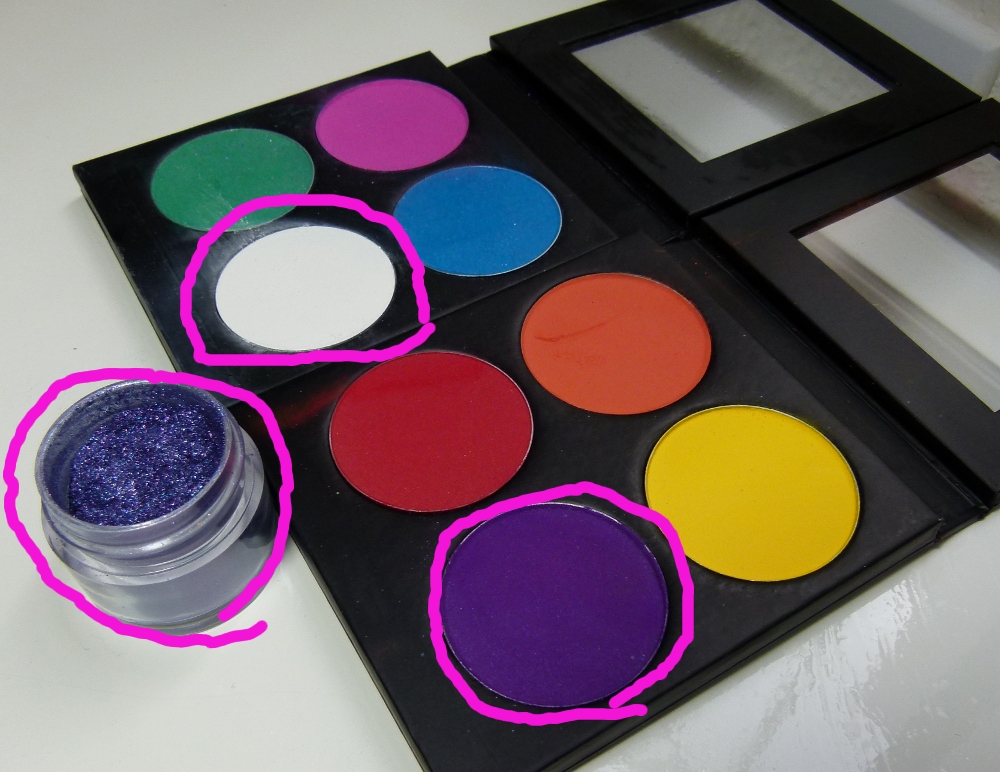
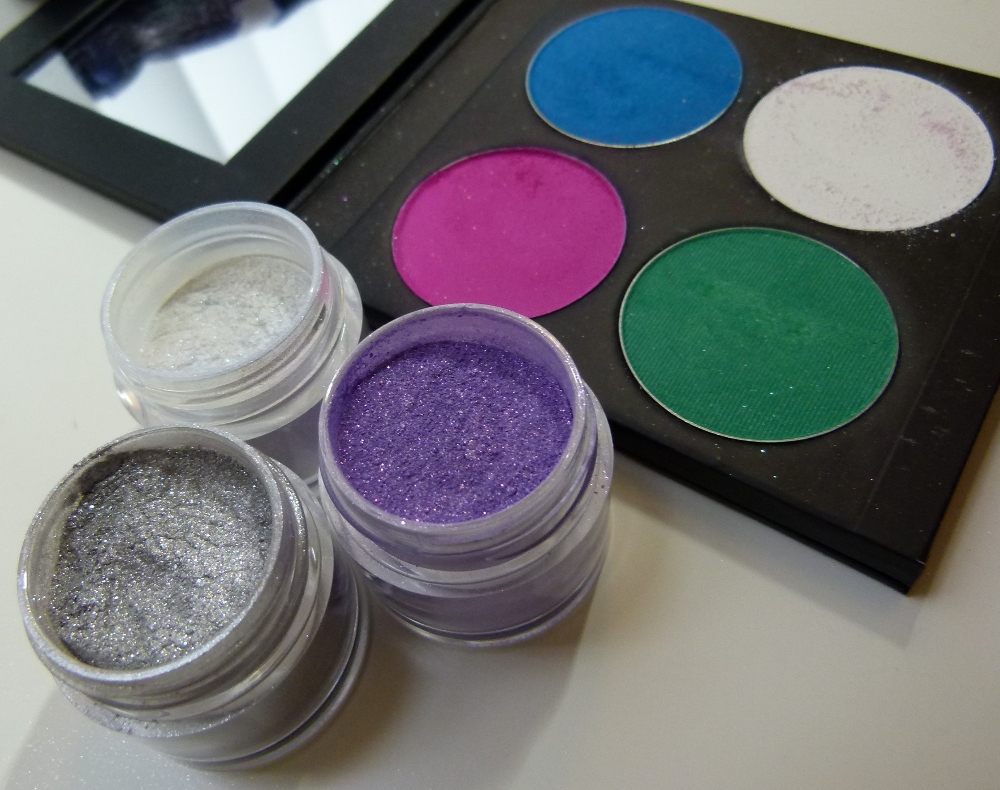
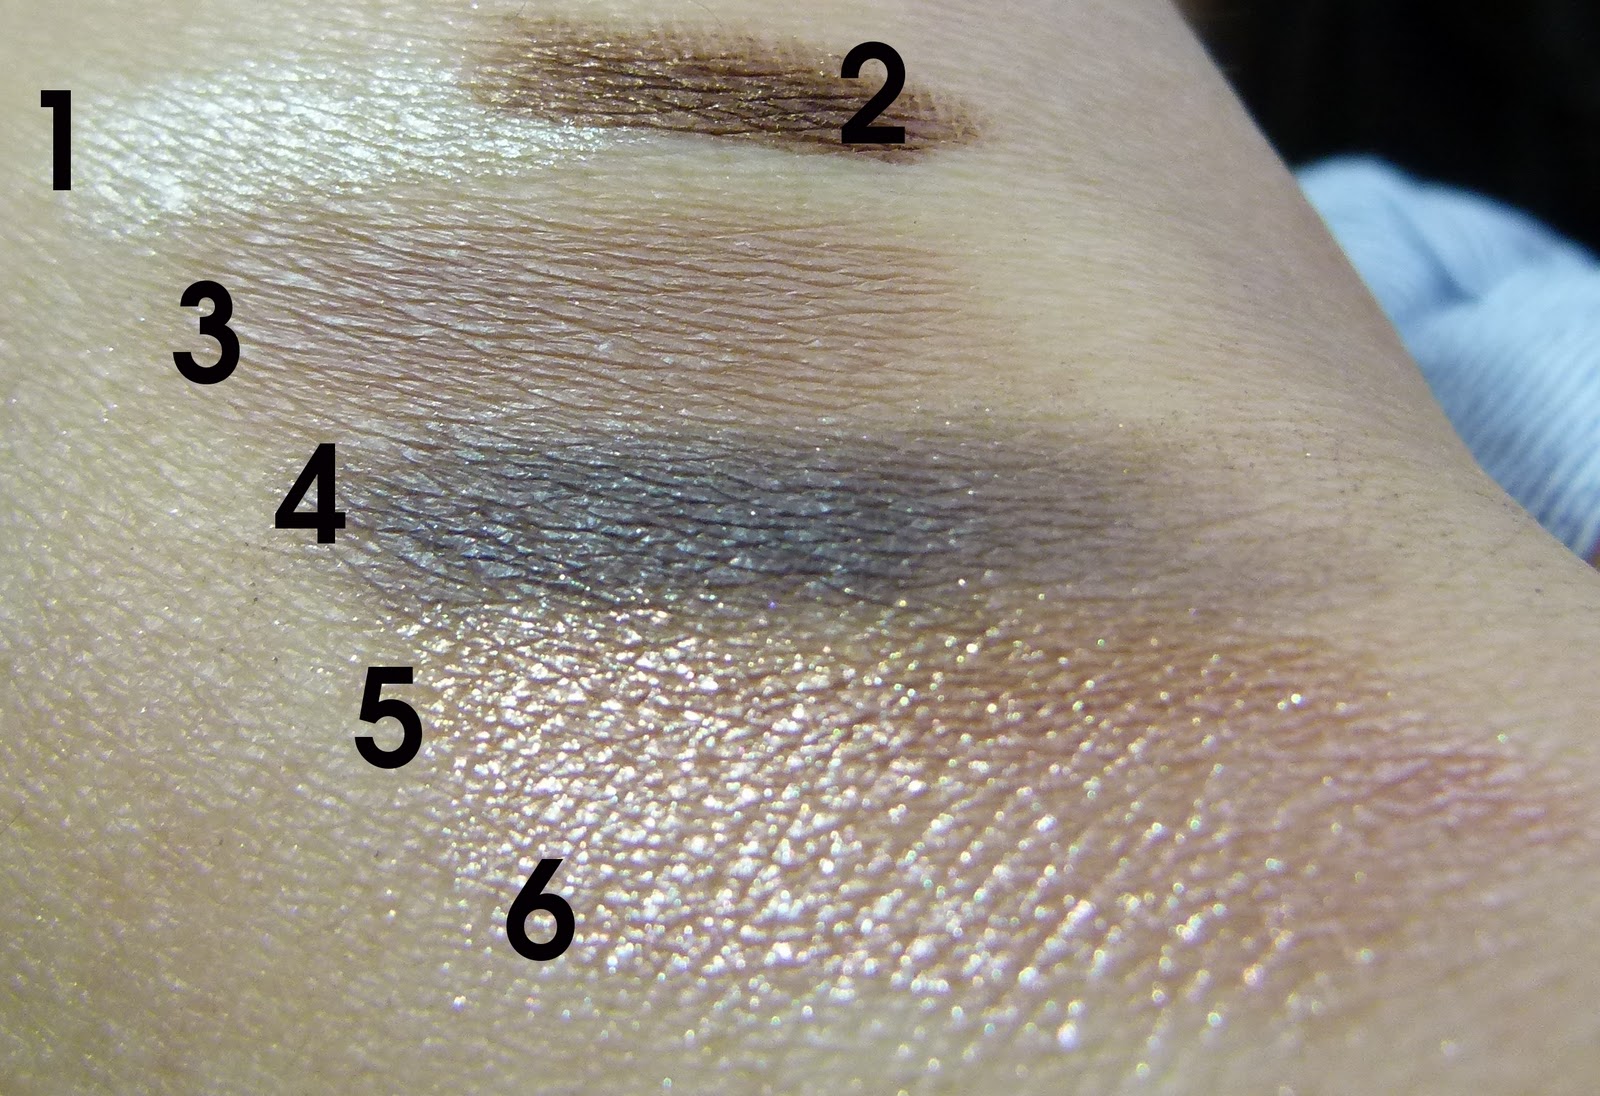
 The products I used!  All by Sugarpill Cosmetics.
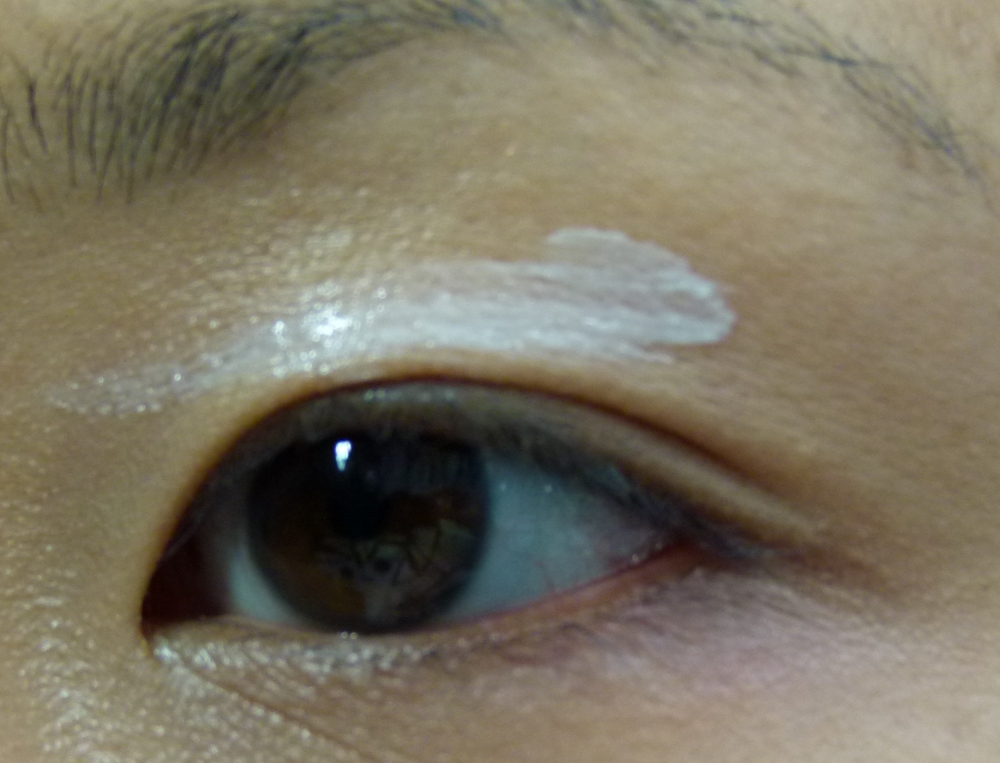
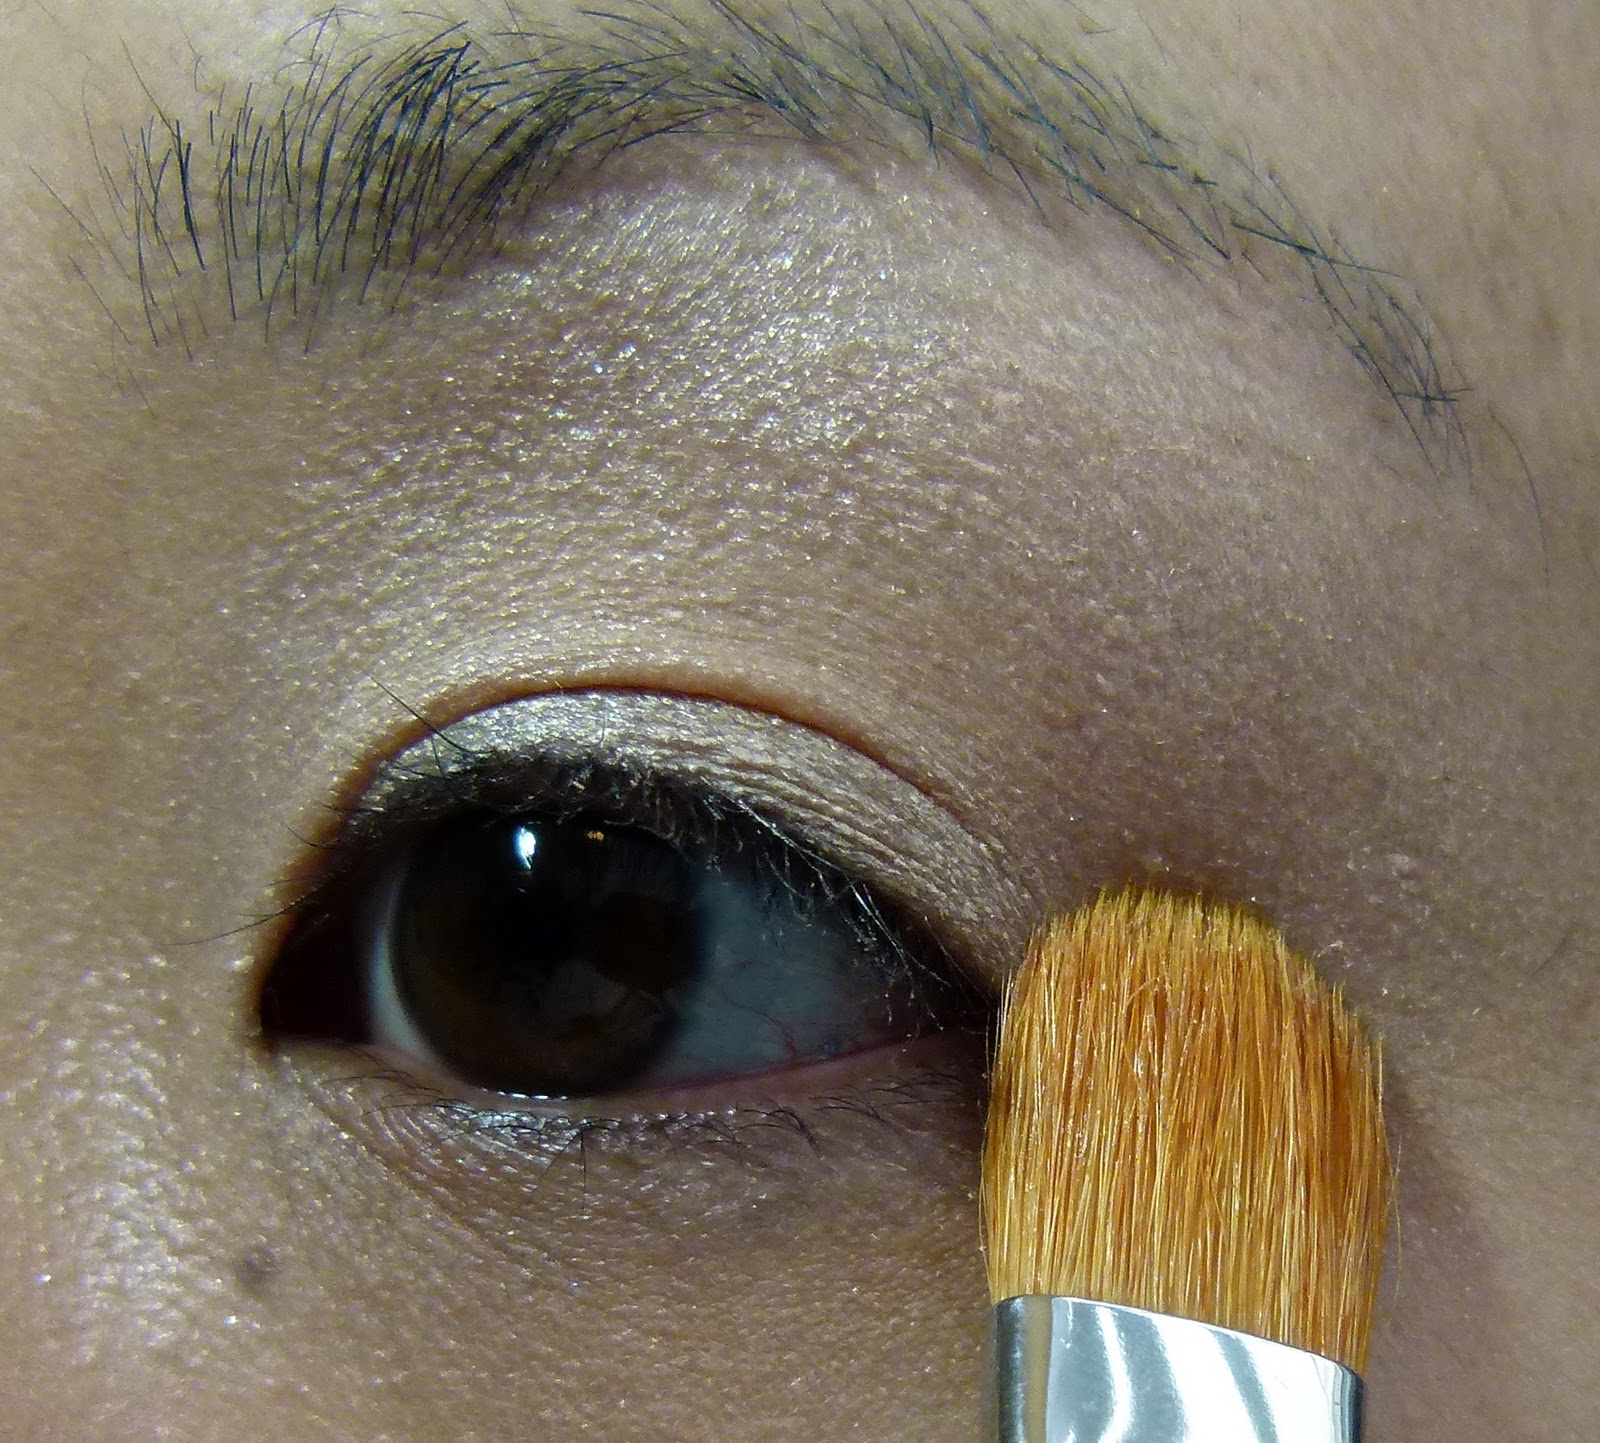
 1. After applying primer, I put a base of MAC Soft Ochre Paint Pot.
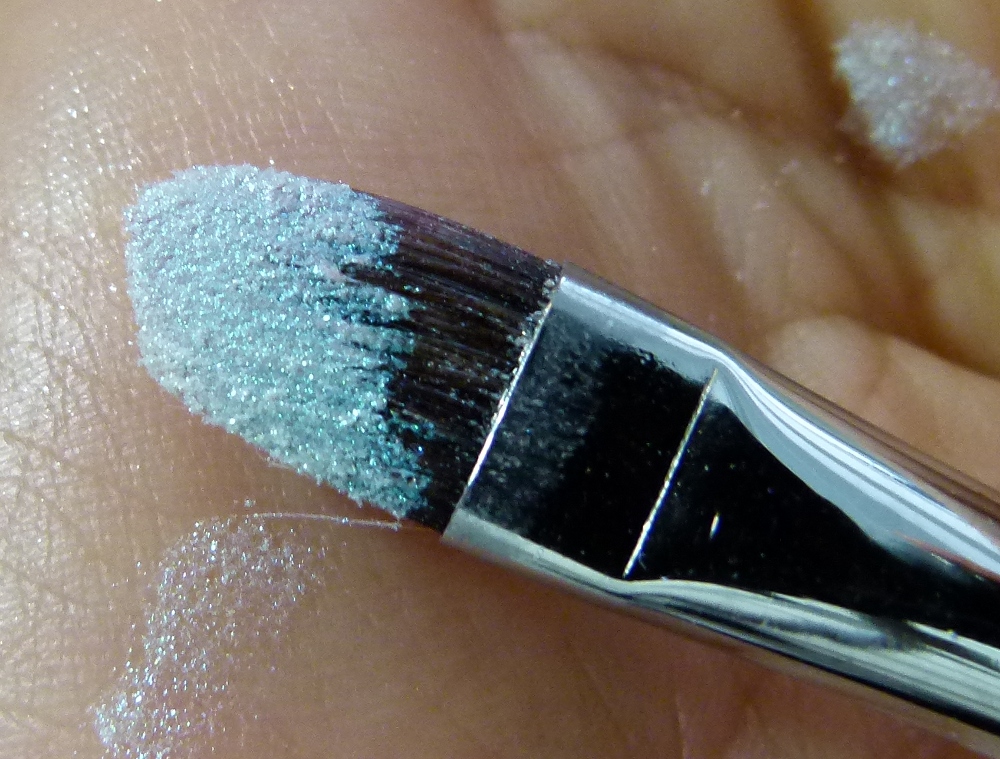
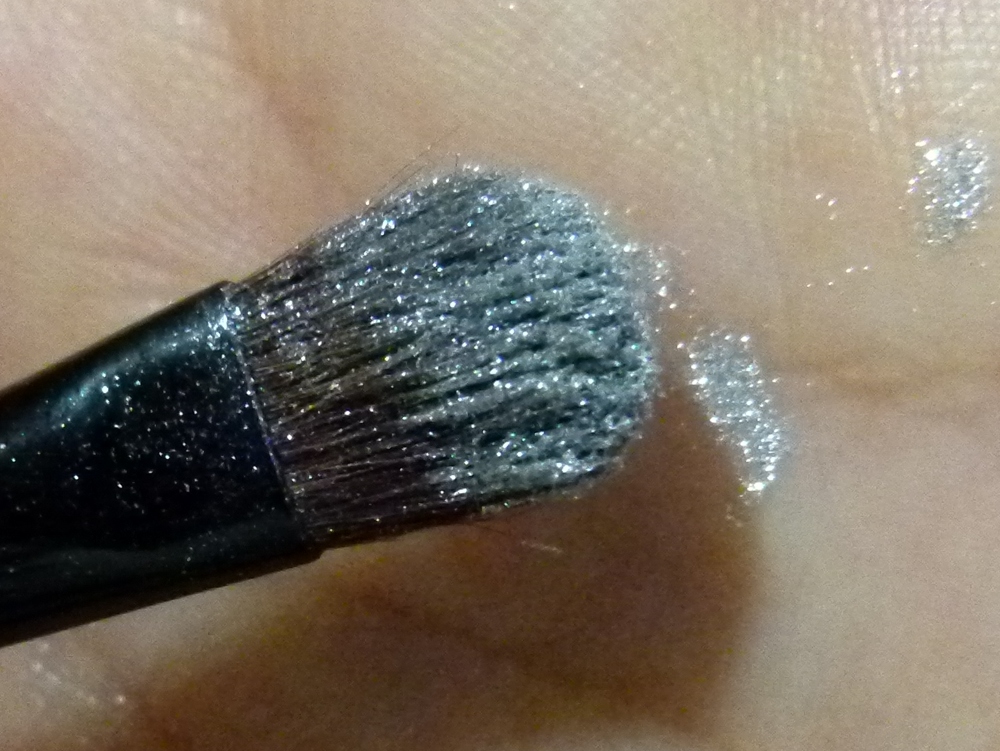
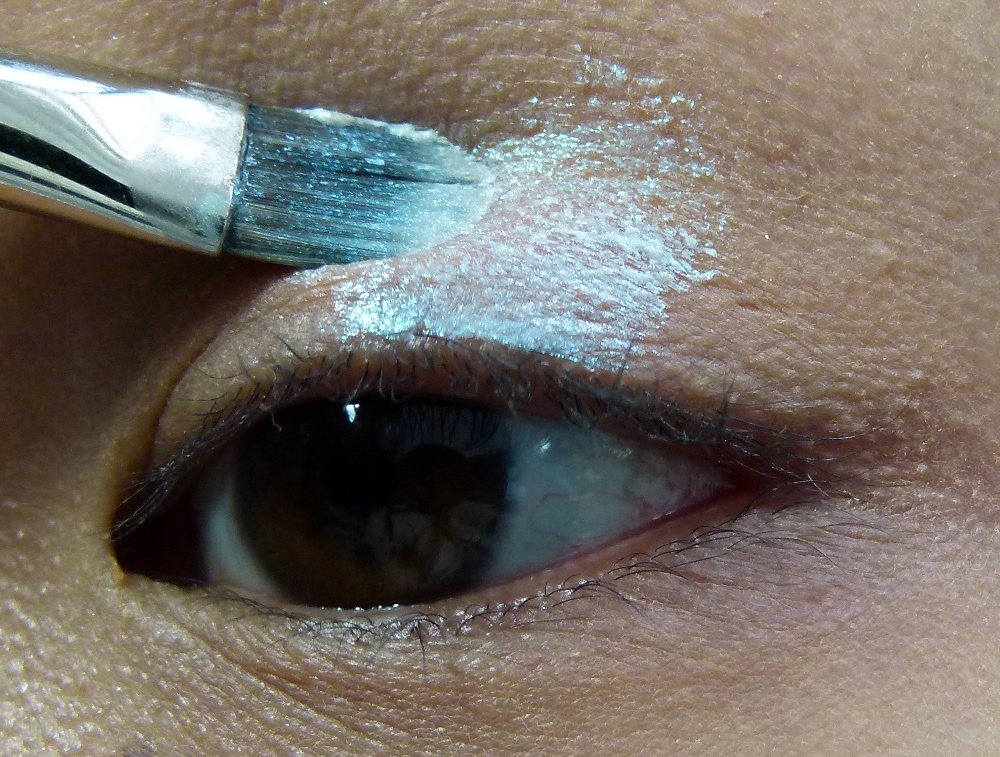
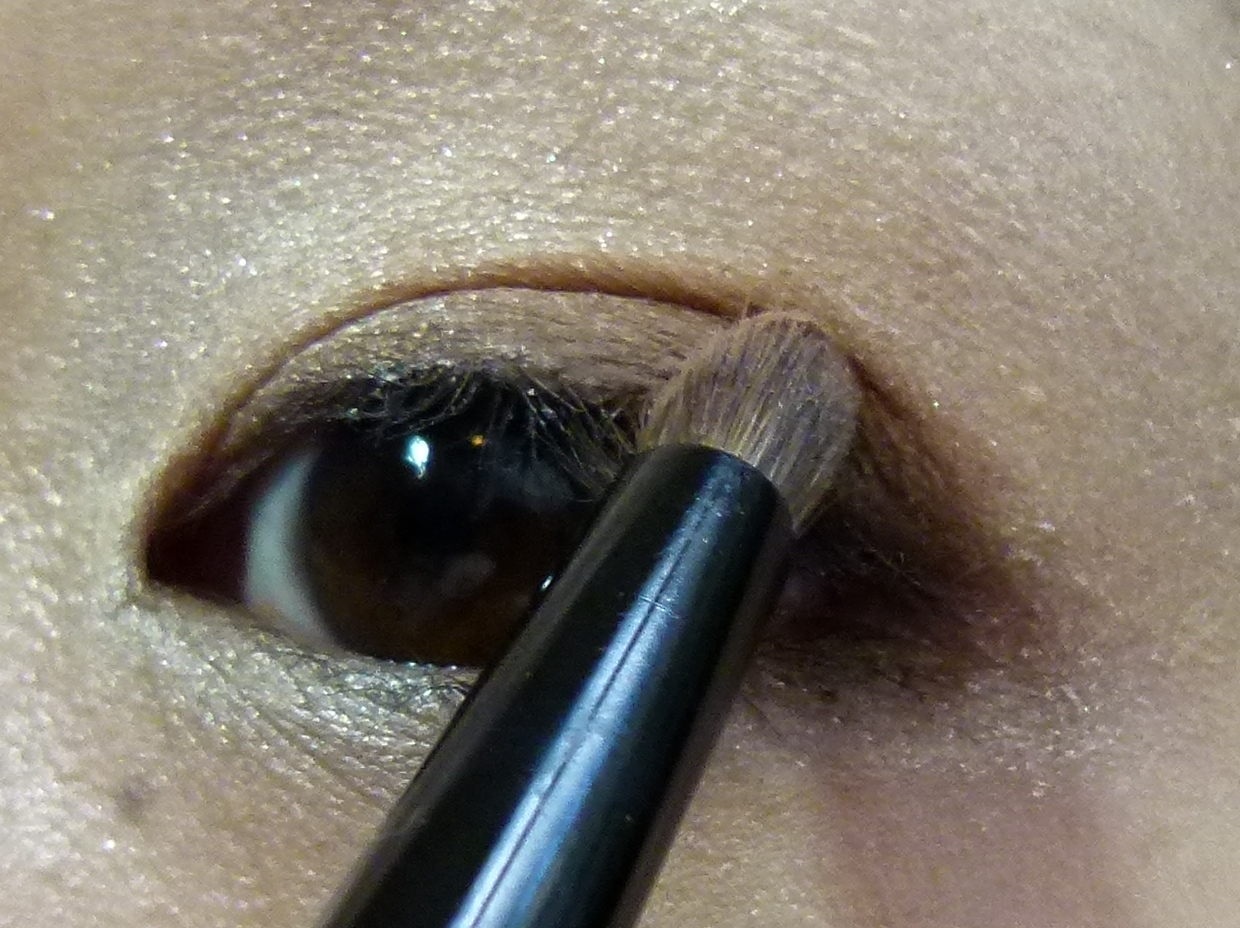
 2. Then I applied Sugarpill Weekender ChromaLust Loose Eyeshadow on the lid.
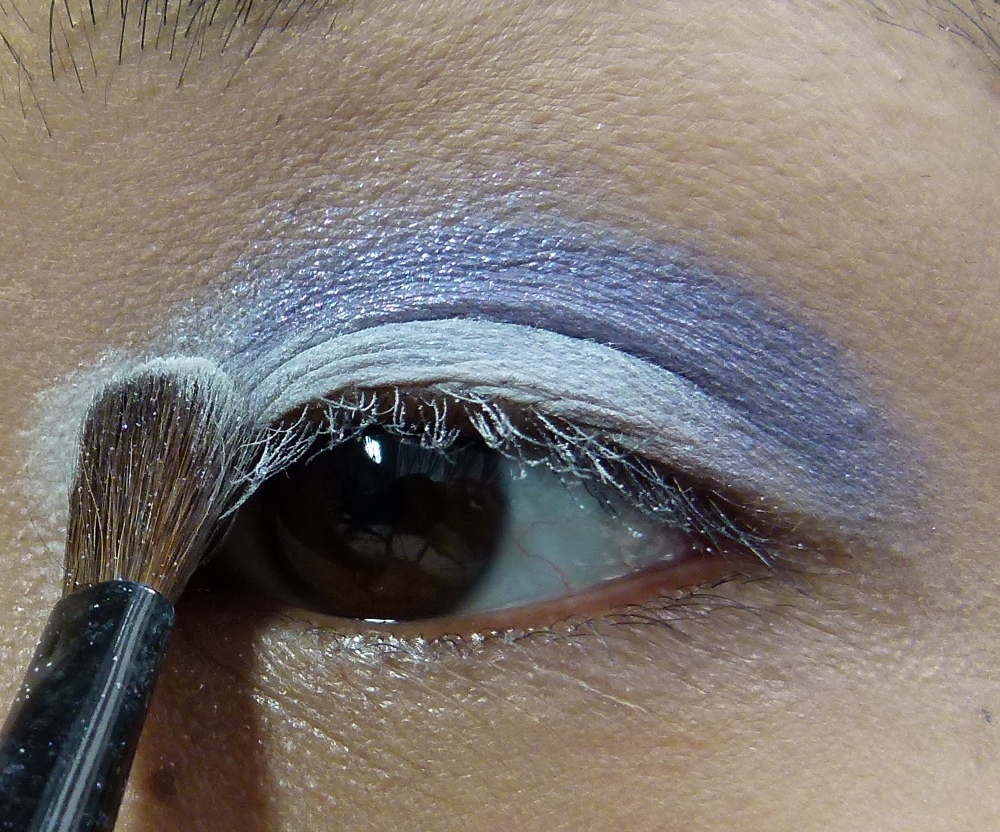
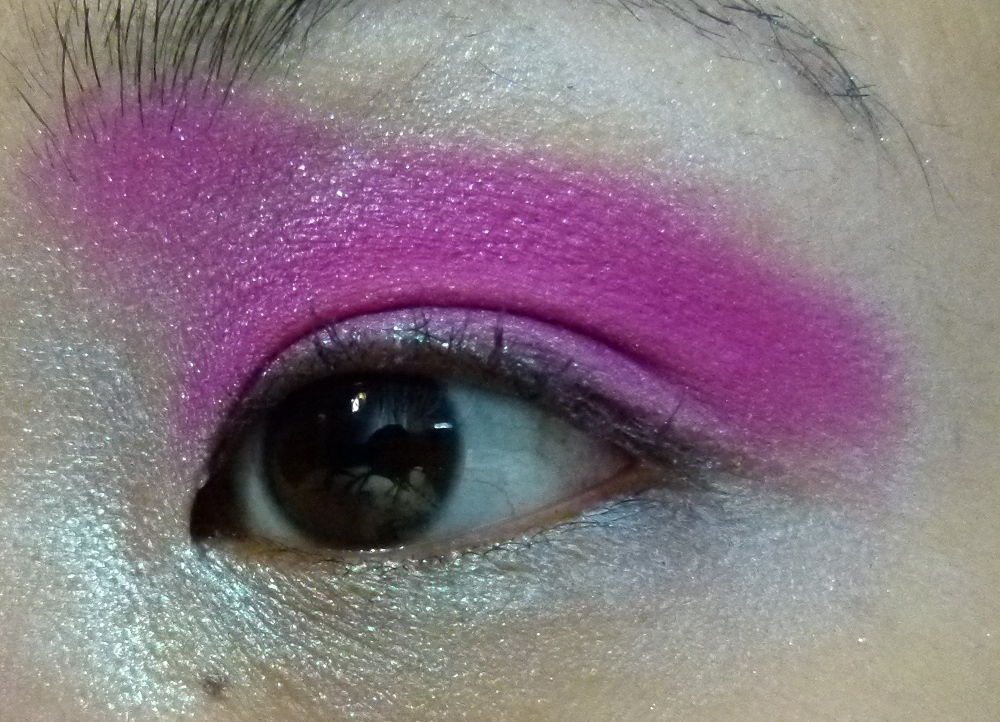
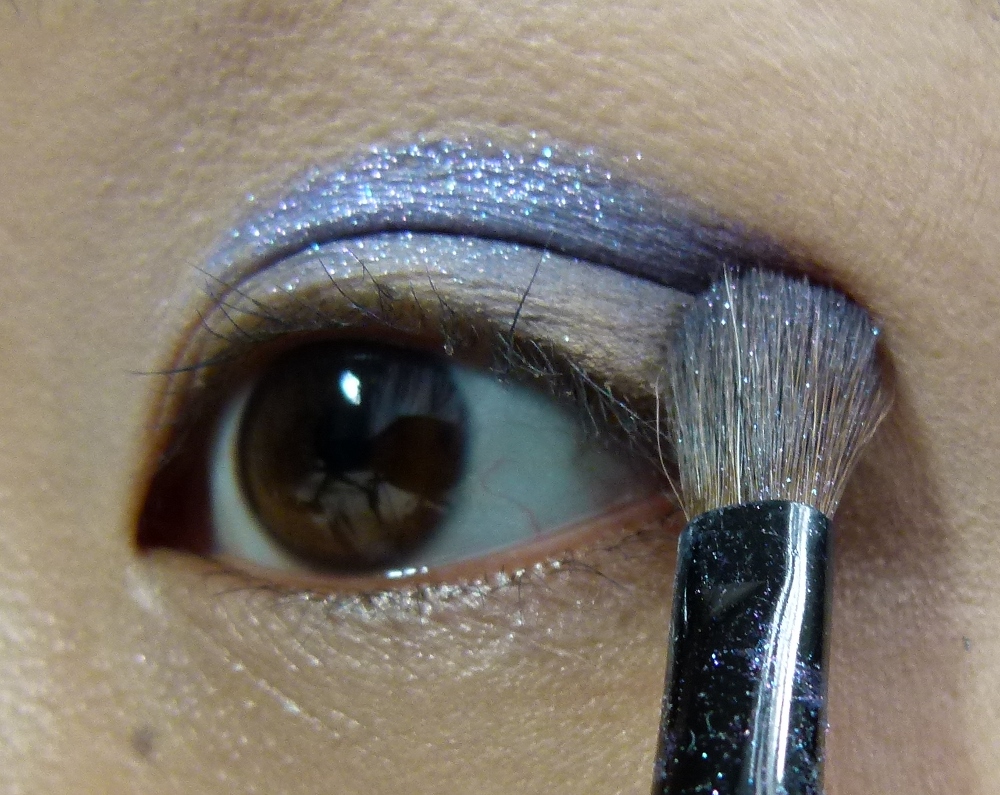
 3. Then I took Tako, a white matte pressed eyeshadow by Sugarpill, and used it at the bottom of the lid and sweeped to the corners near the tear ducts.
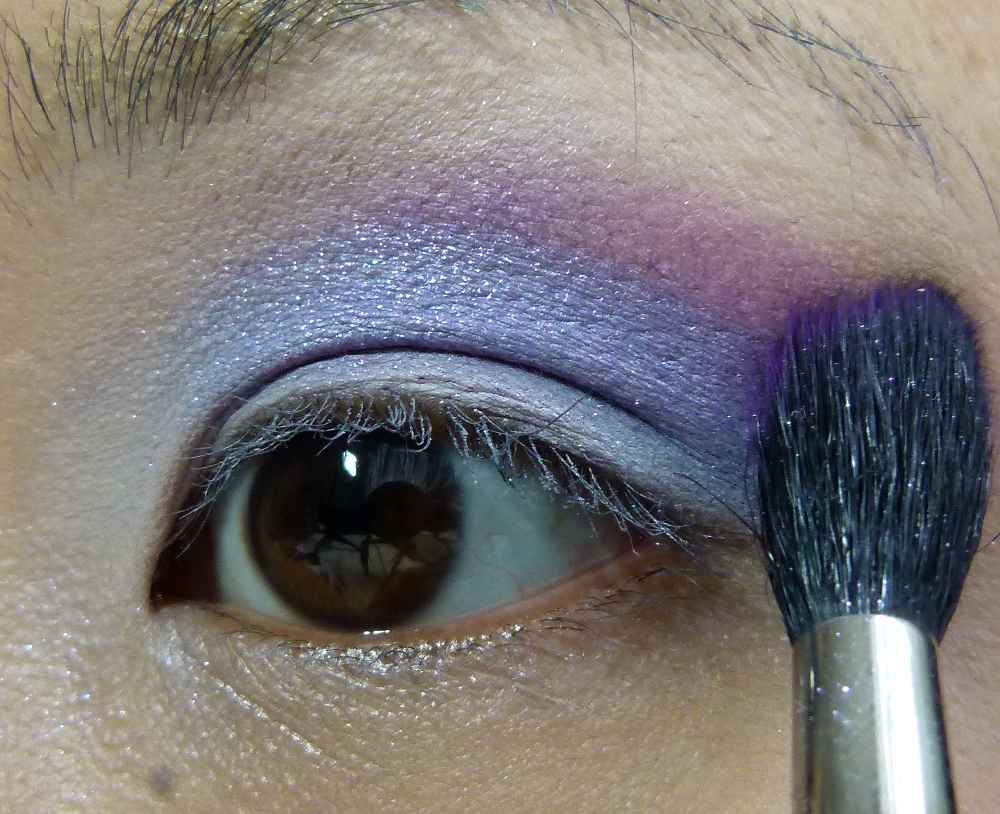
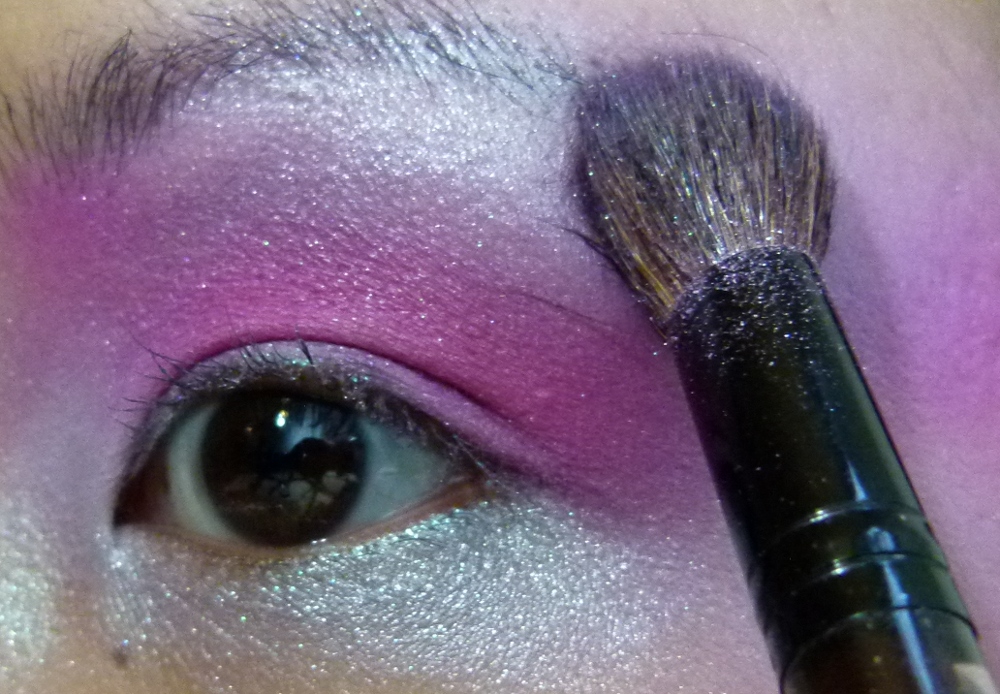
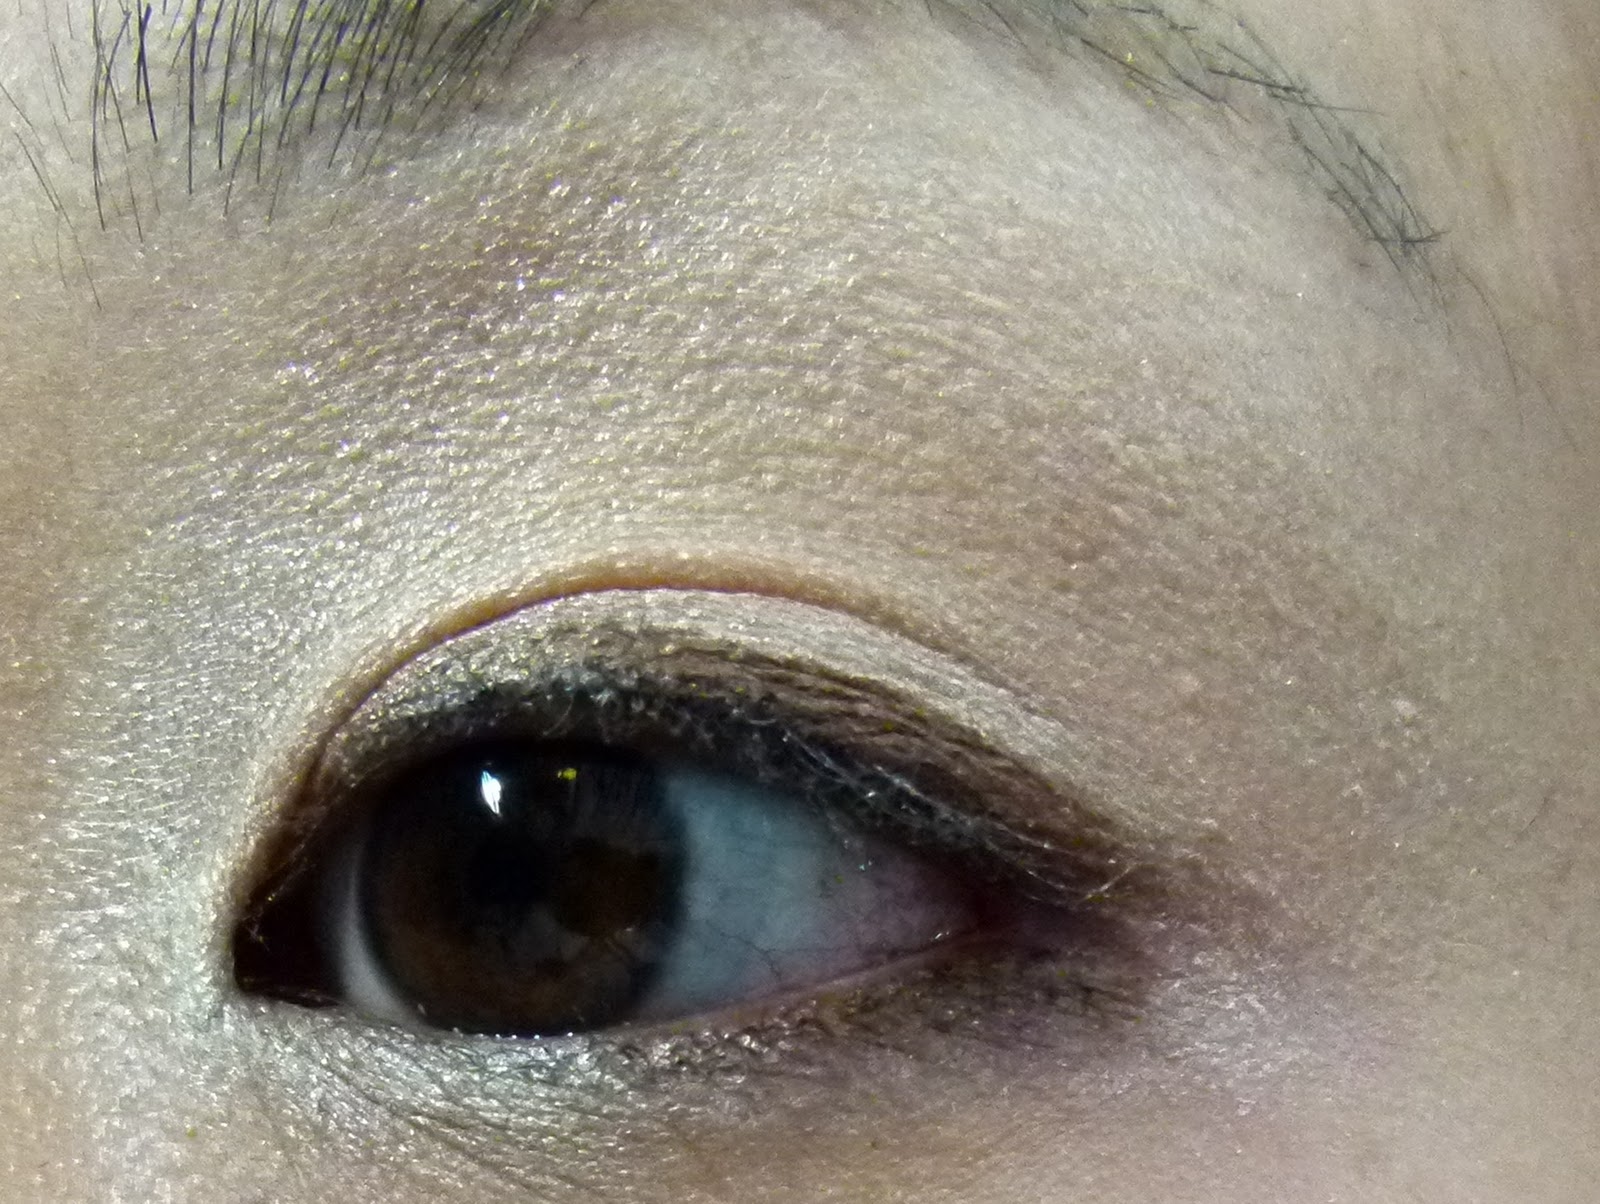
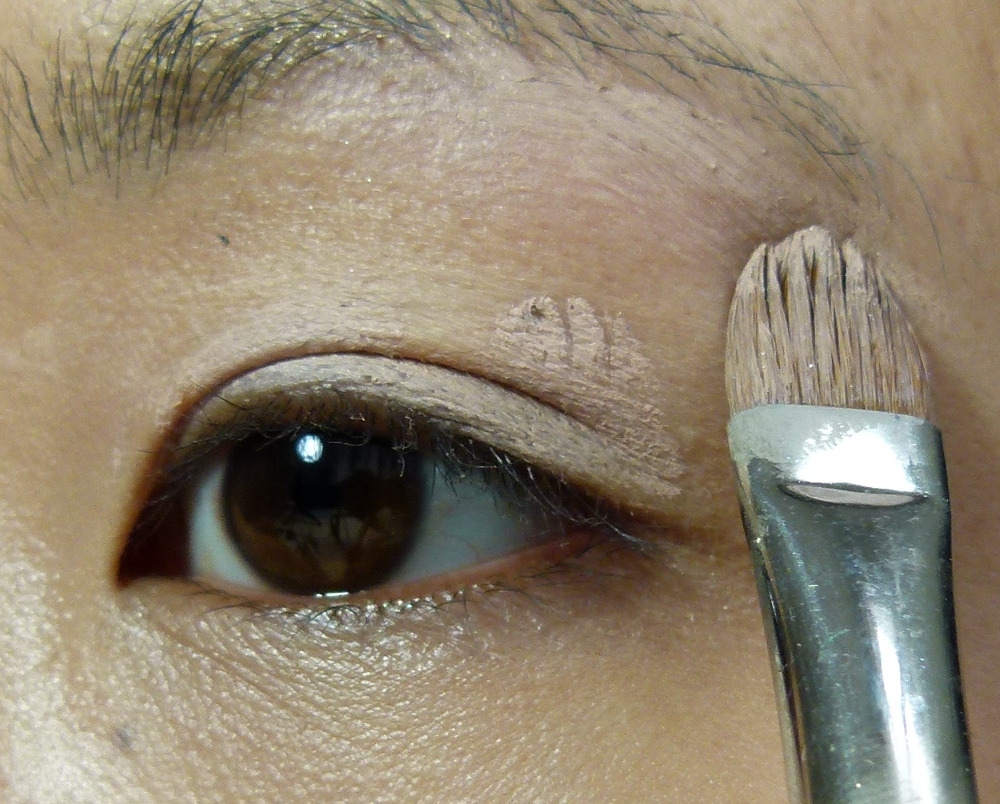
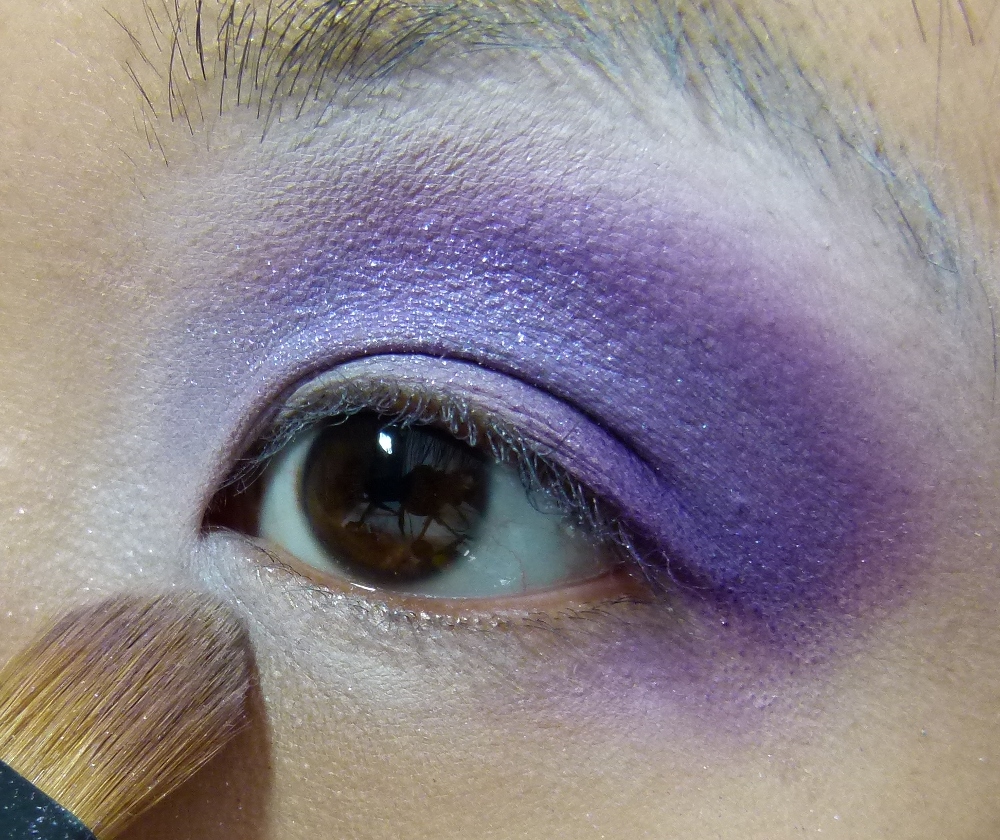
 4. I brushed Poison Plum, a deep violet pressed eyeshadow with slight shimmer, creating a faux crease.
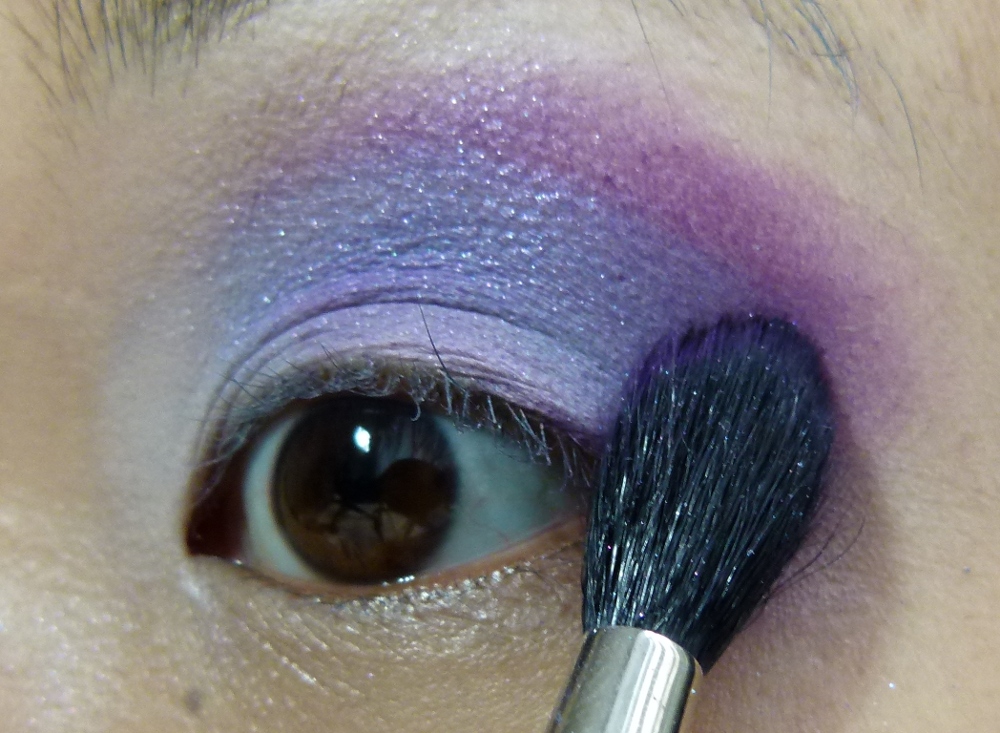
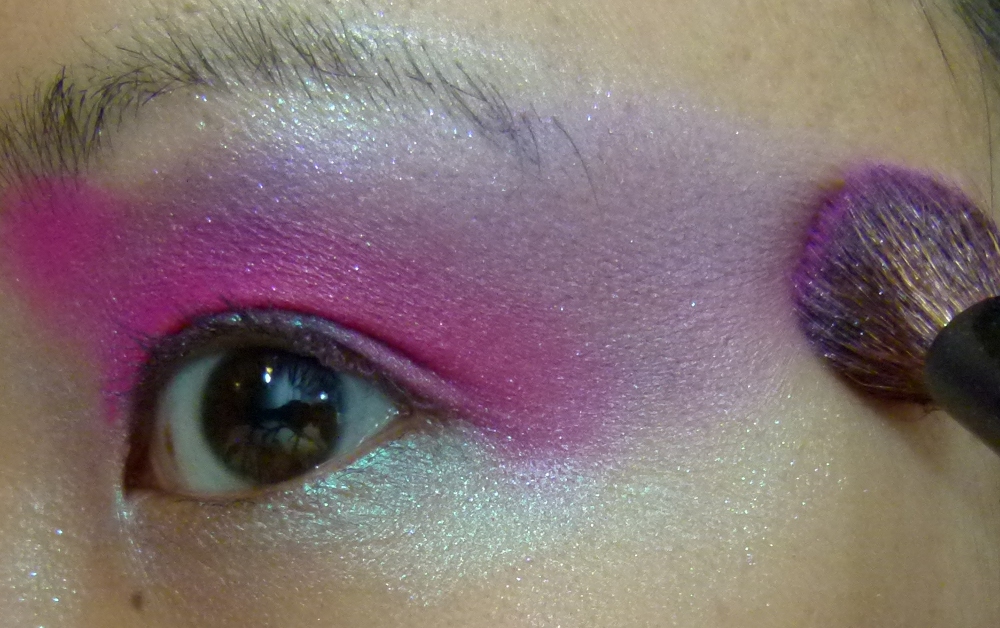
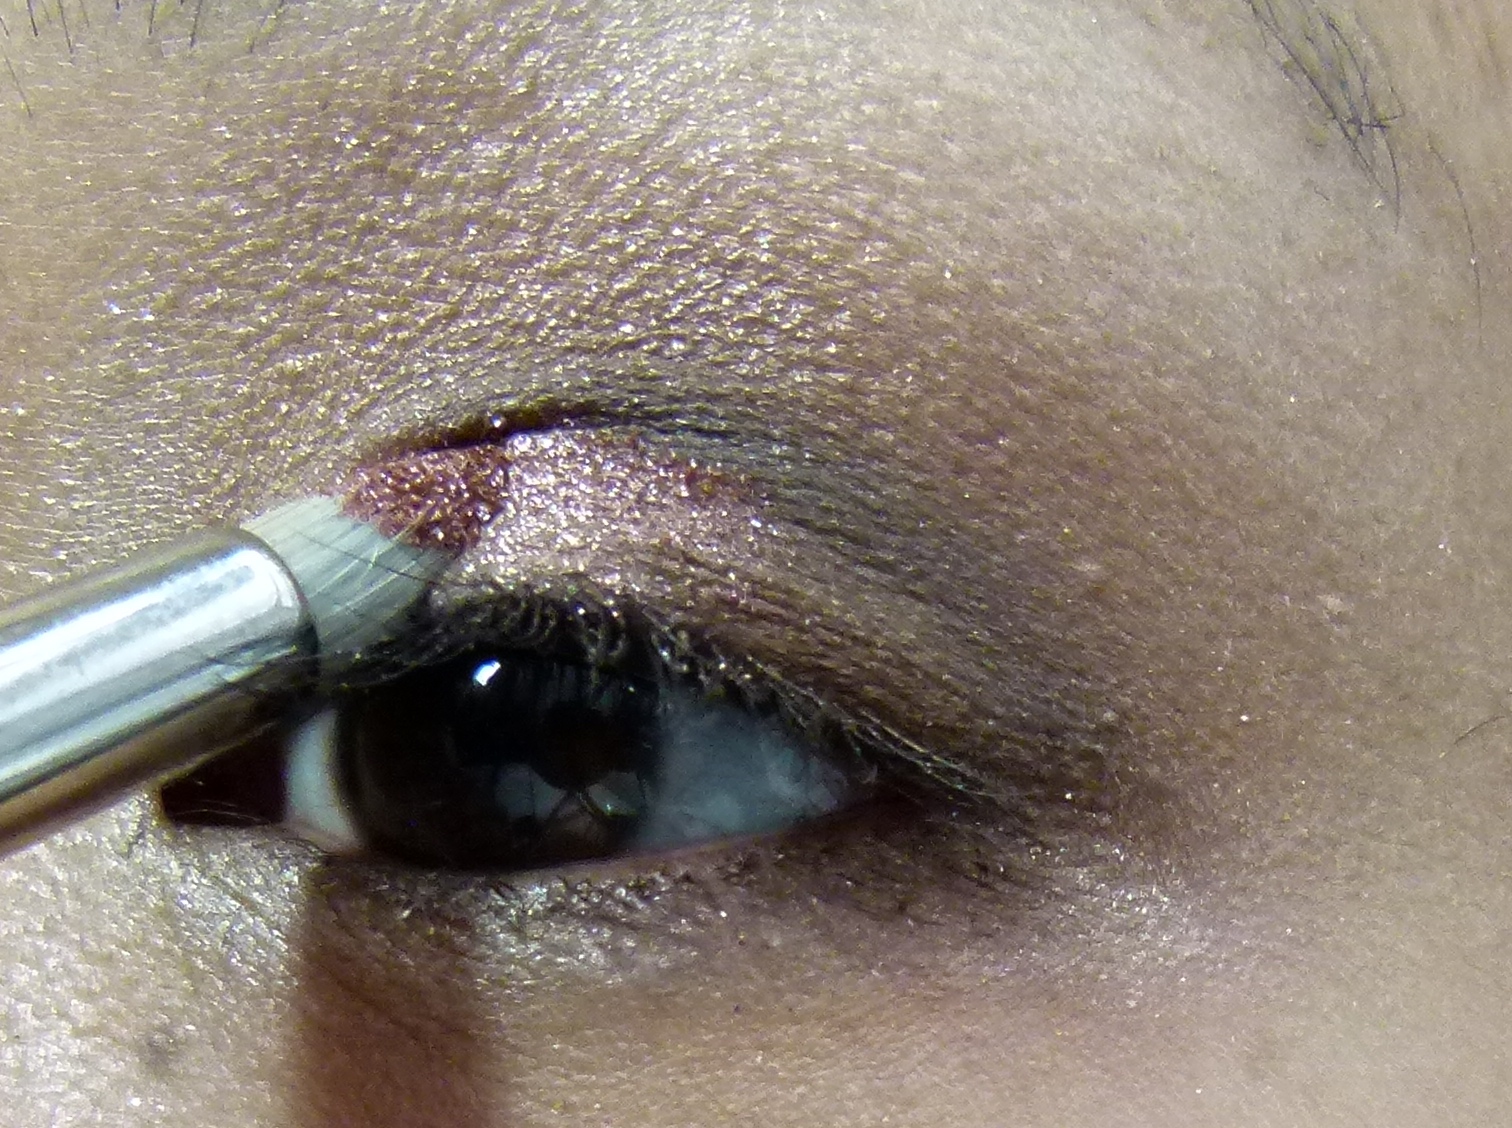
 5. I bring Poison Plum to the outer corners of my eye creating a long 7 shape from the corner of the eye over the lid.
 6. Blend, blend, blend.  Bring down Tako to the lower lashline.
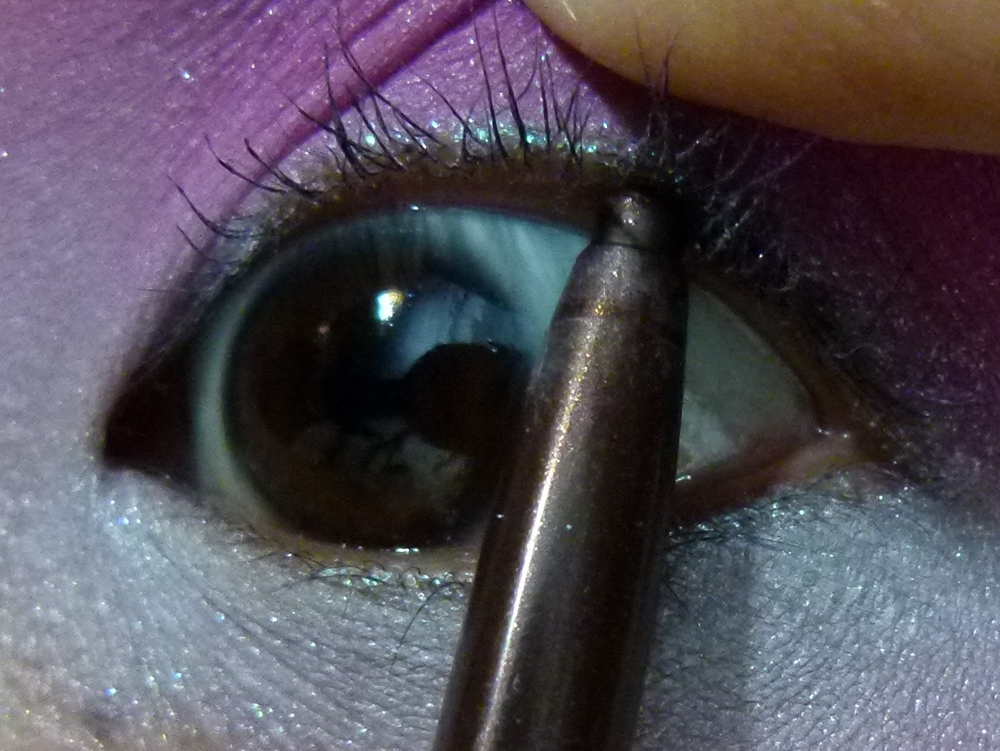
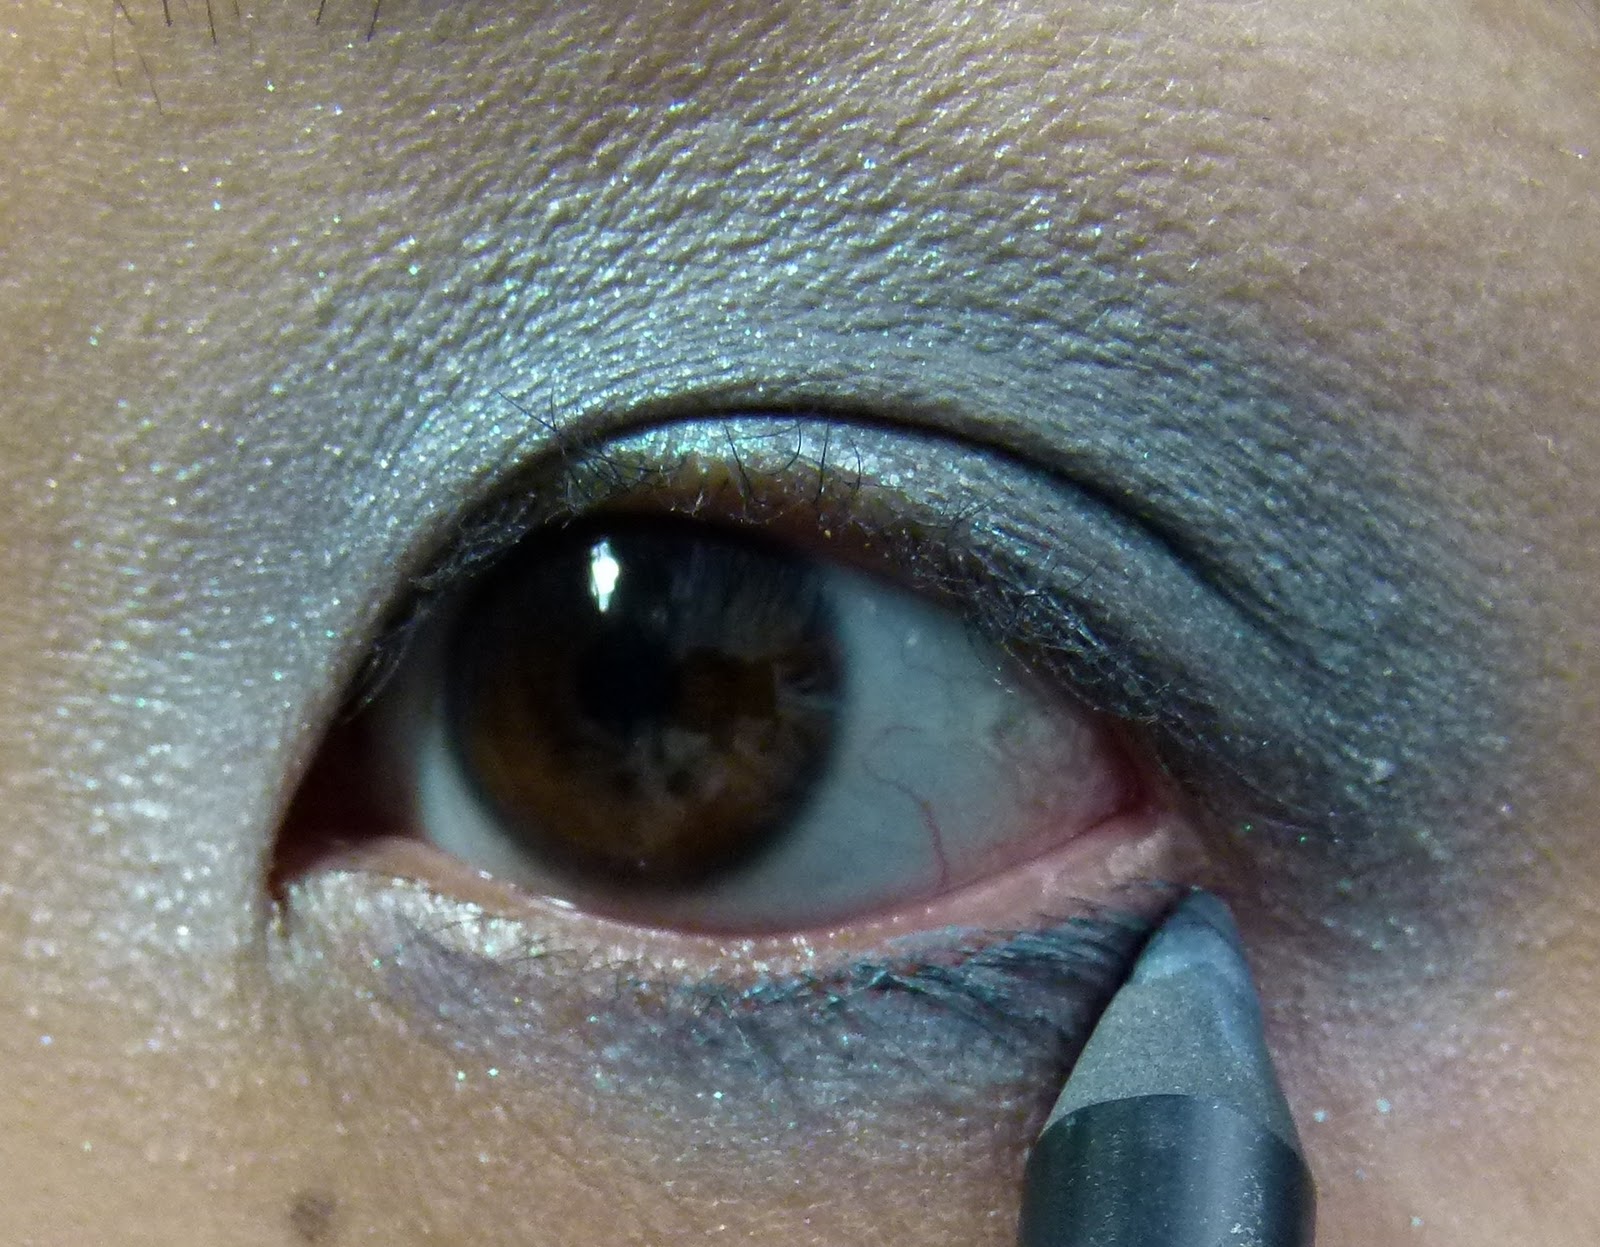
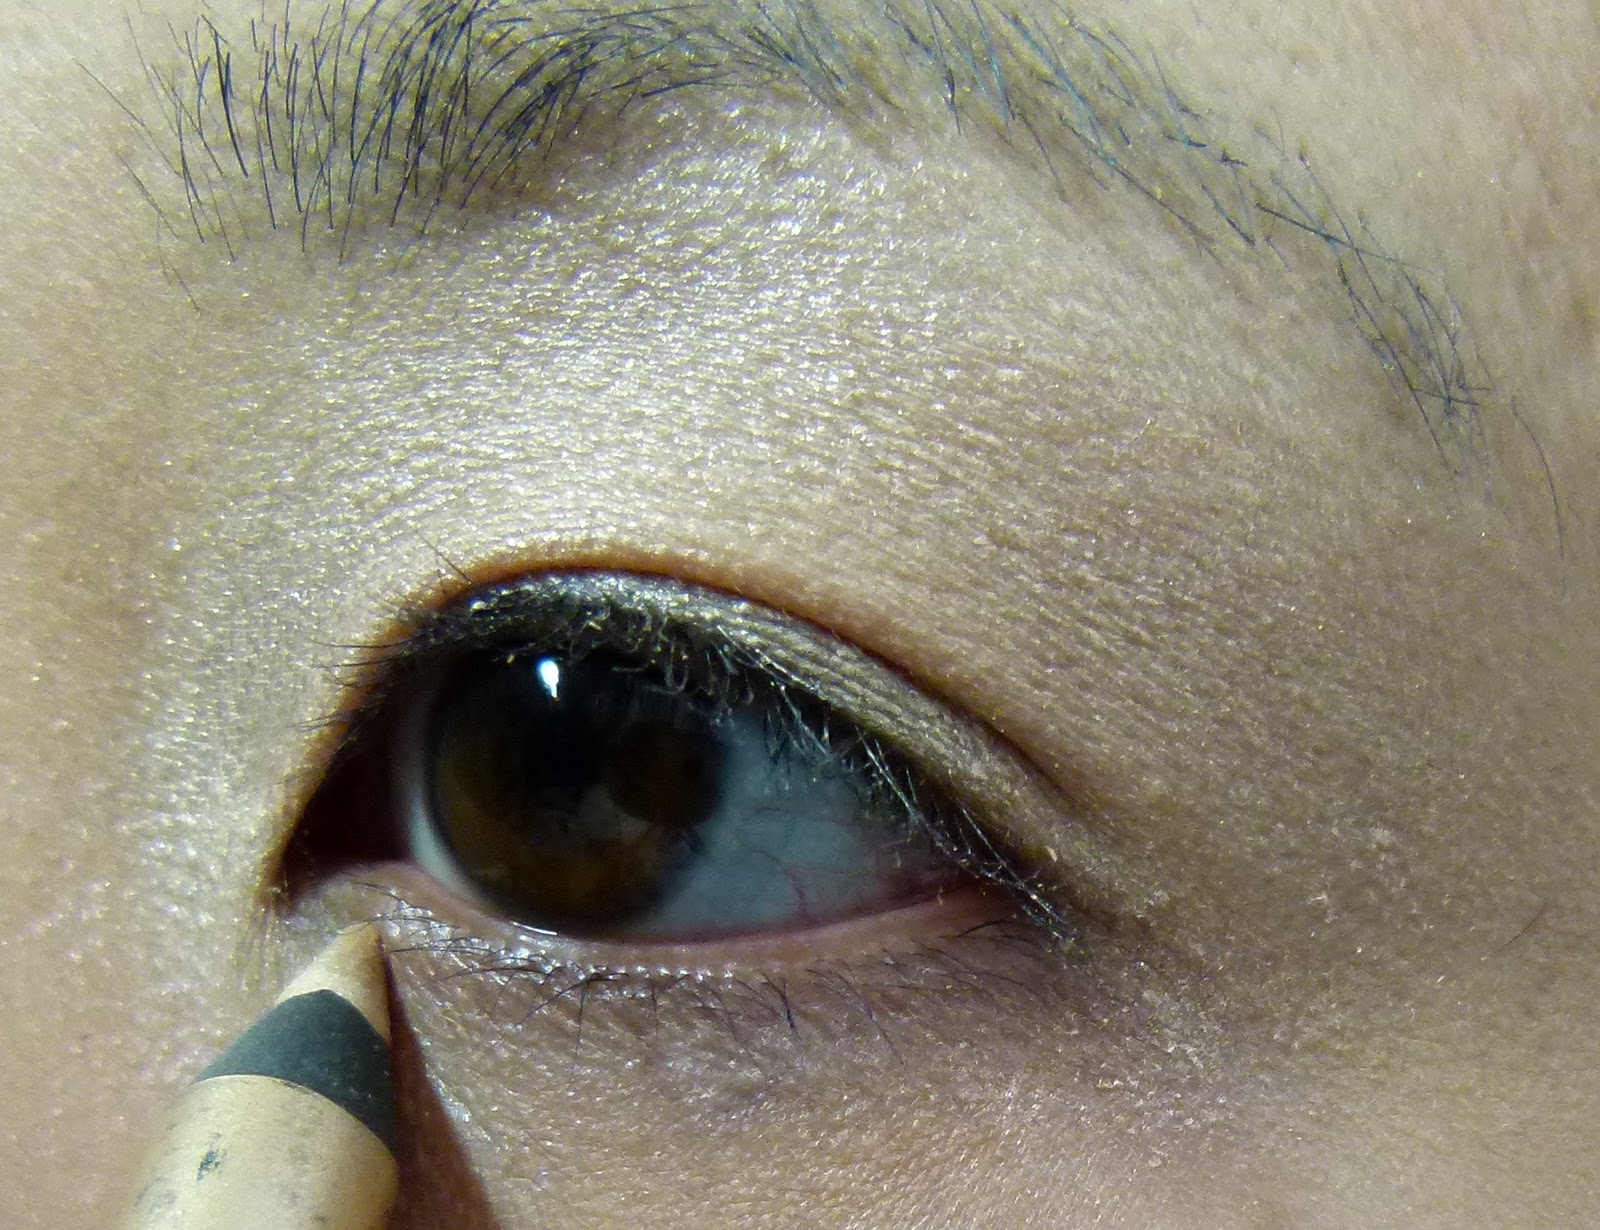
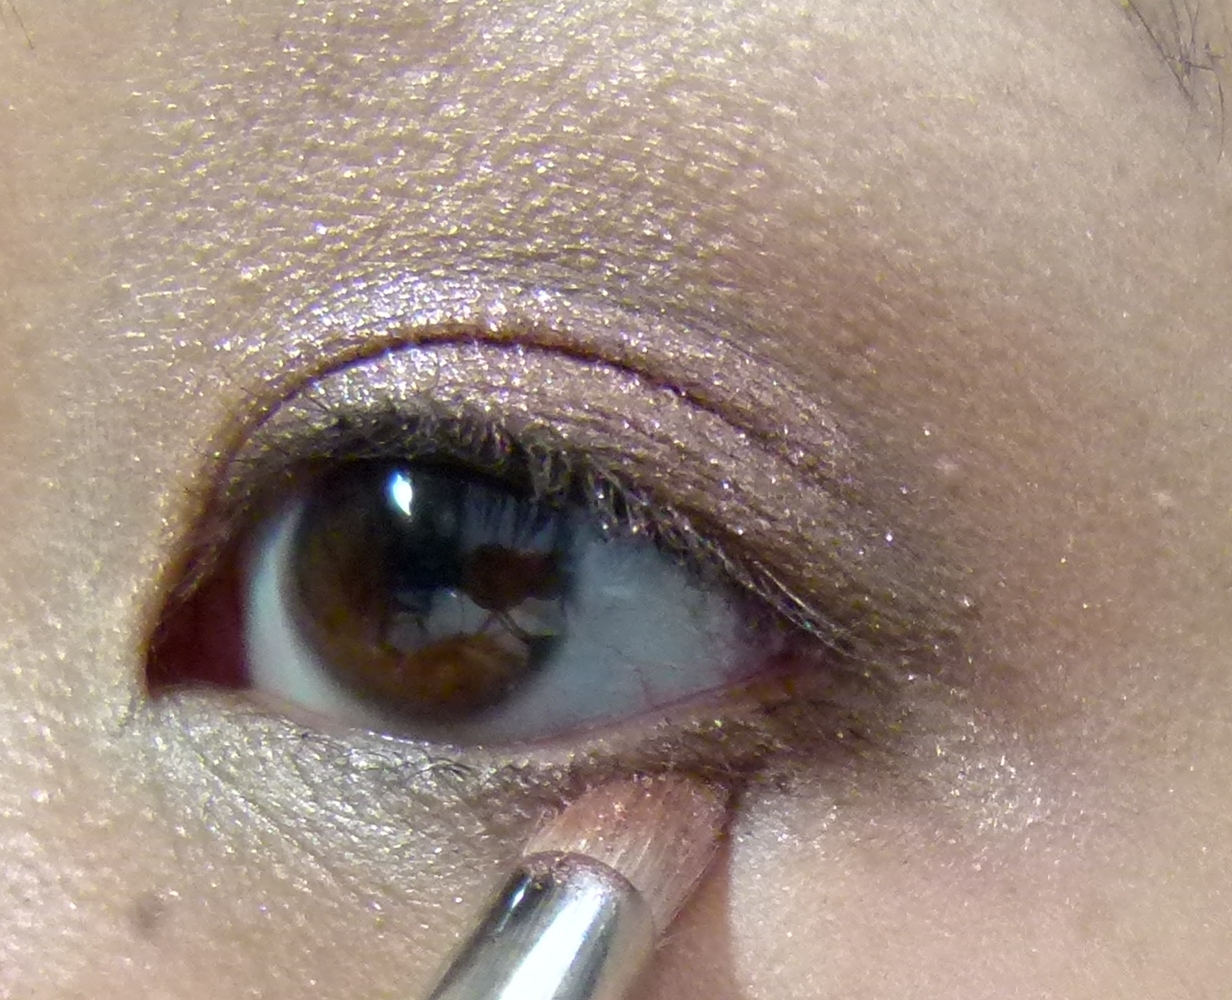
 7. Using a black eyeliner, I line the waterline and do a soft cat eye towards the outer corners.
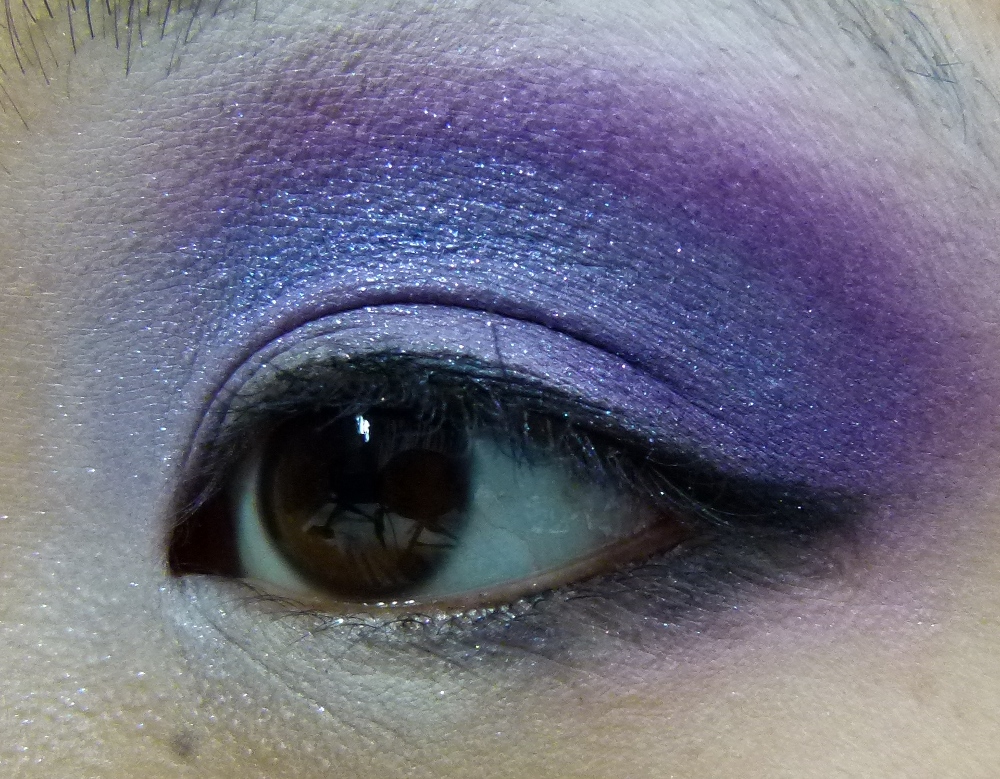
 8. I smudge the black pencil down to the outer third of the lower lashline.
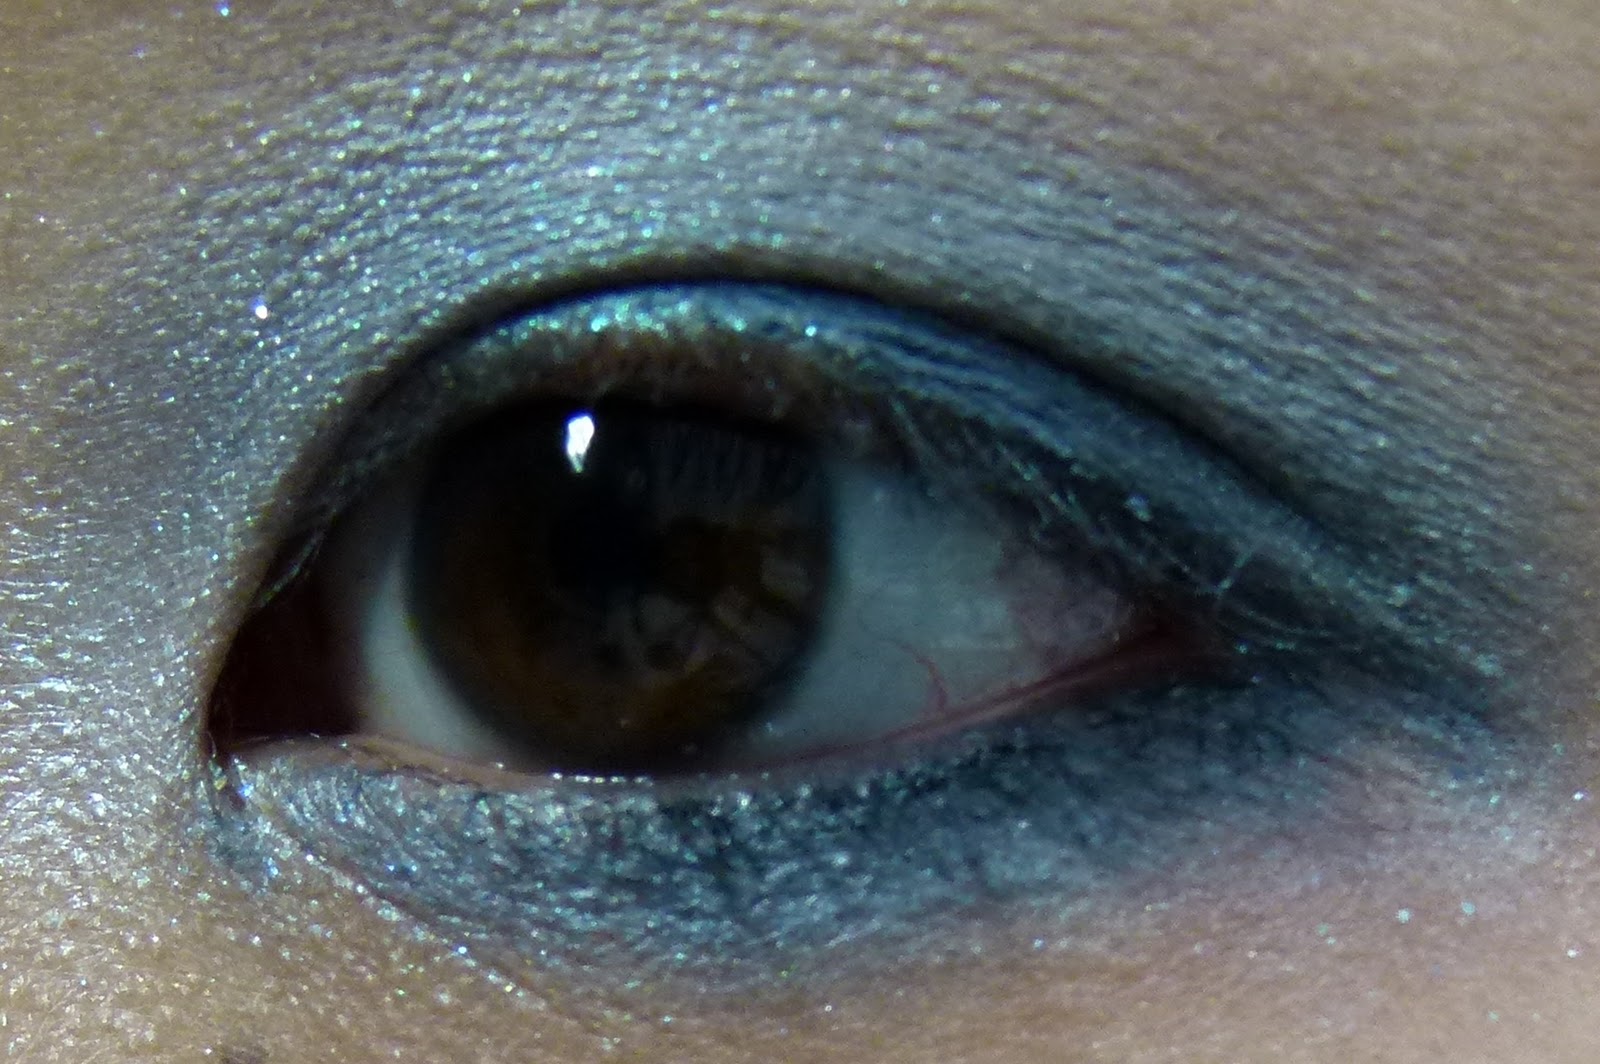
 9. I used Maybelline Unstoppable Highlighter in Fluffy Cloud, a matte white,  to line the inner corner of the lower waterline.
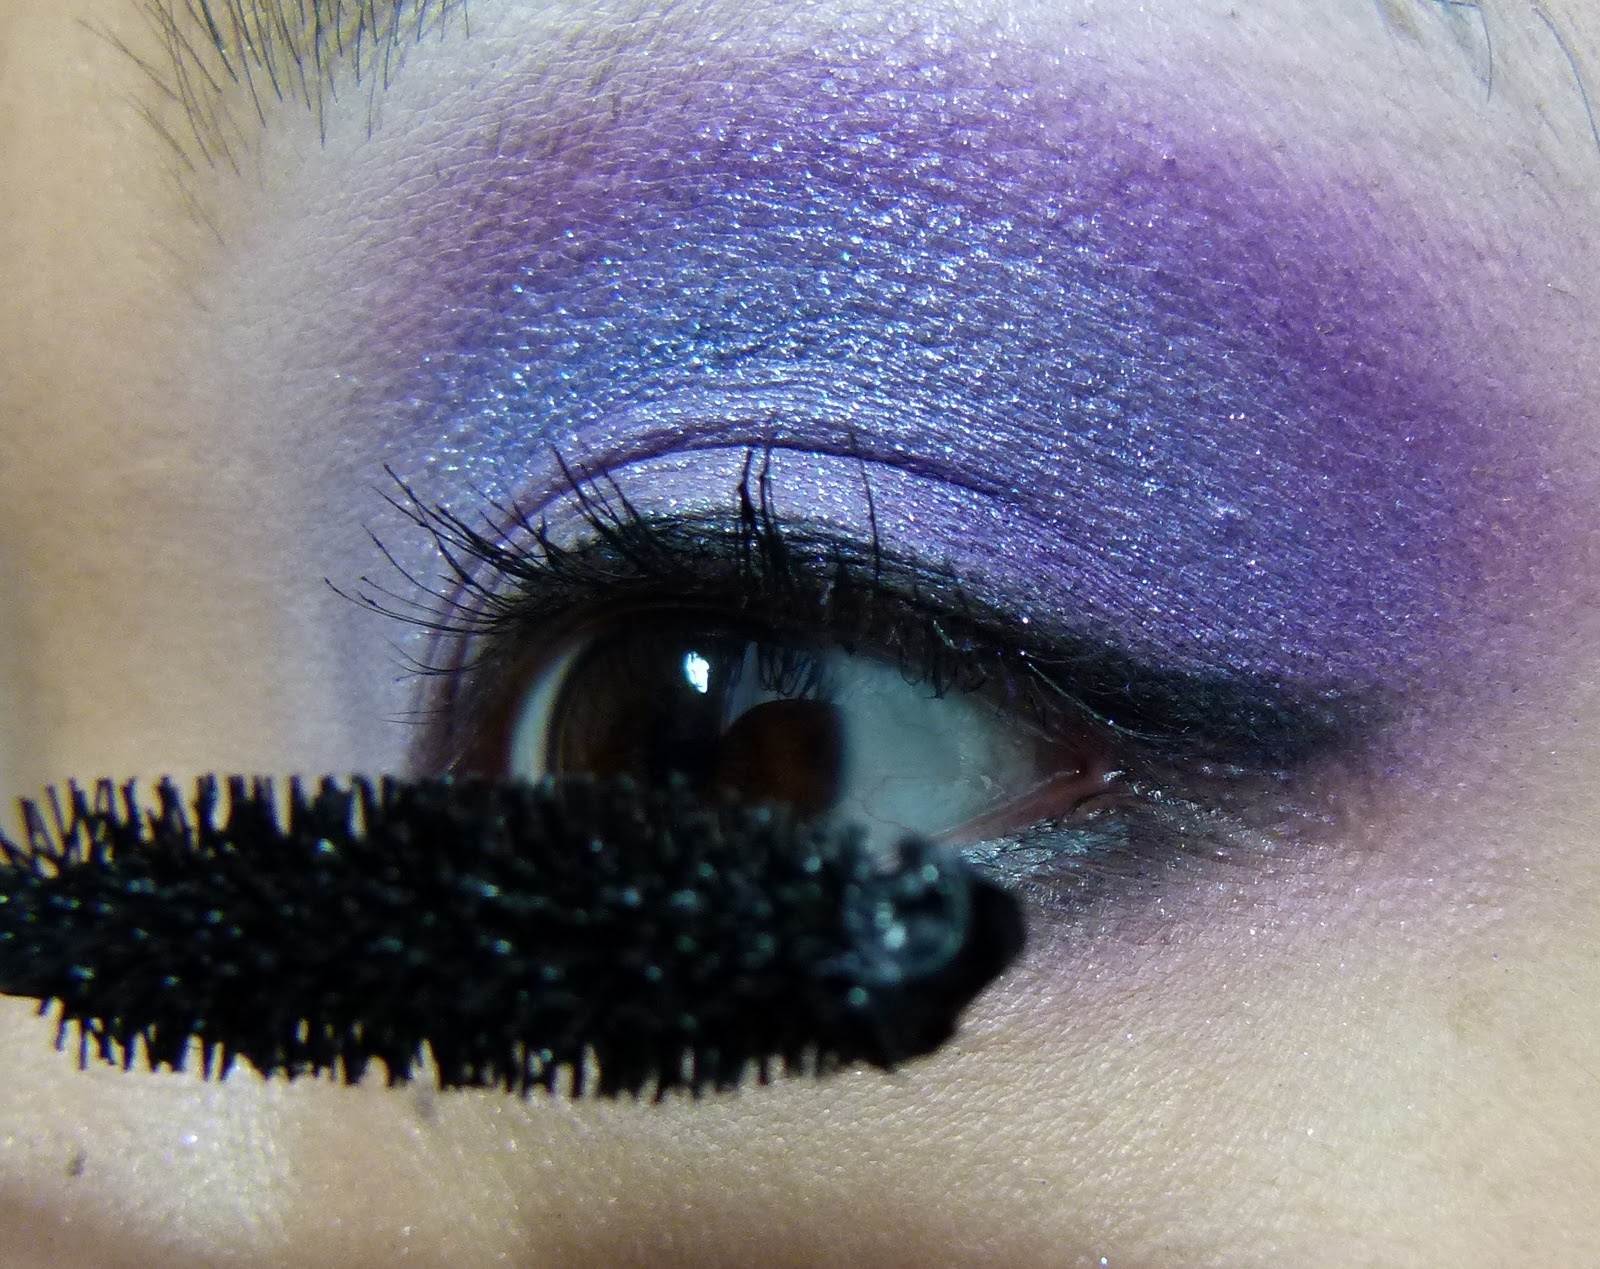
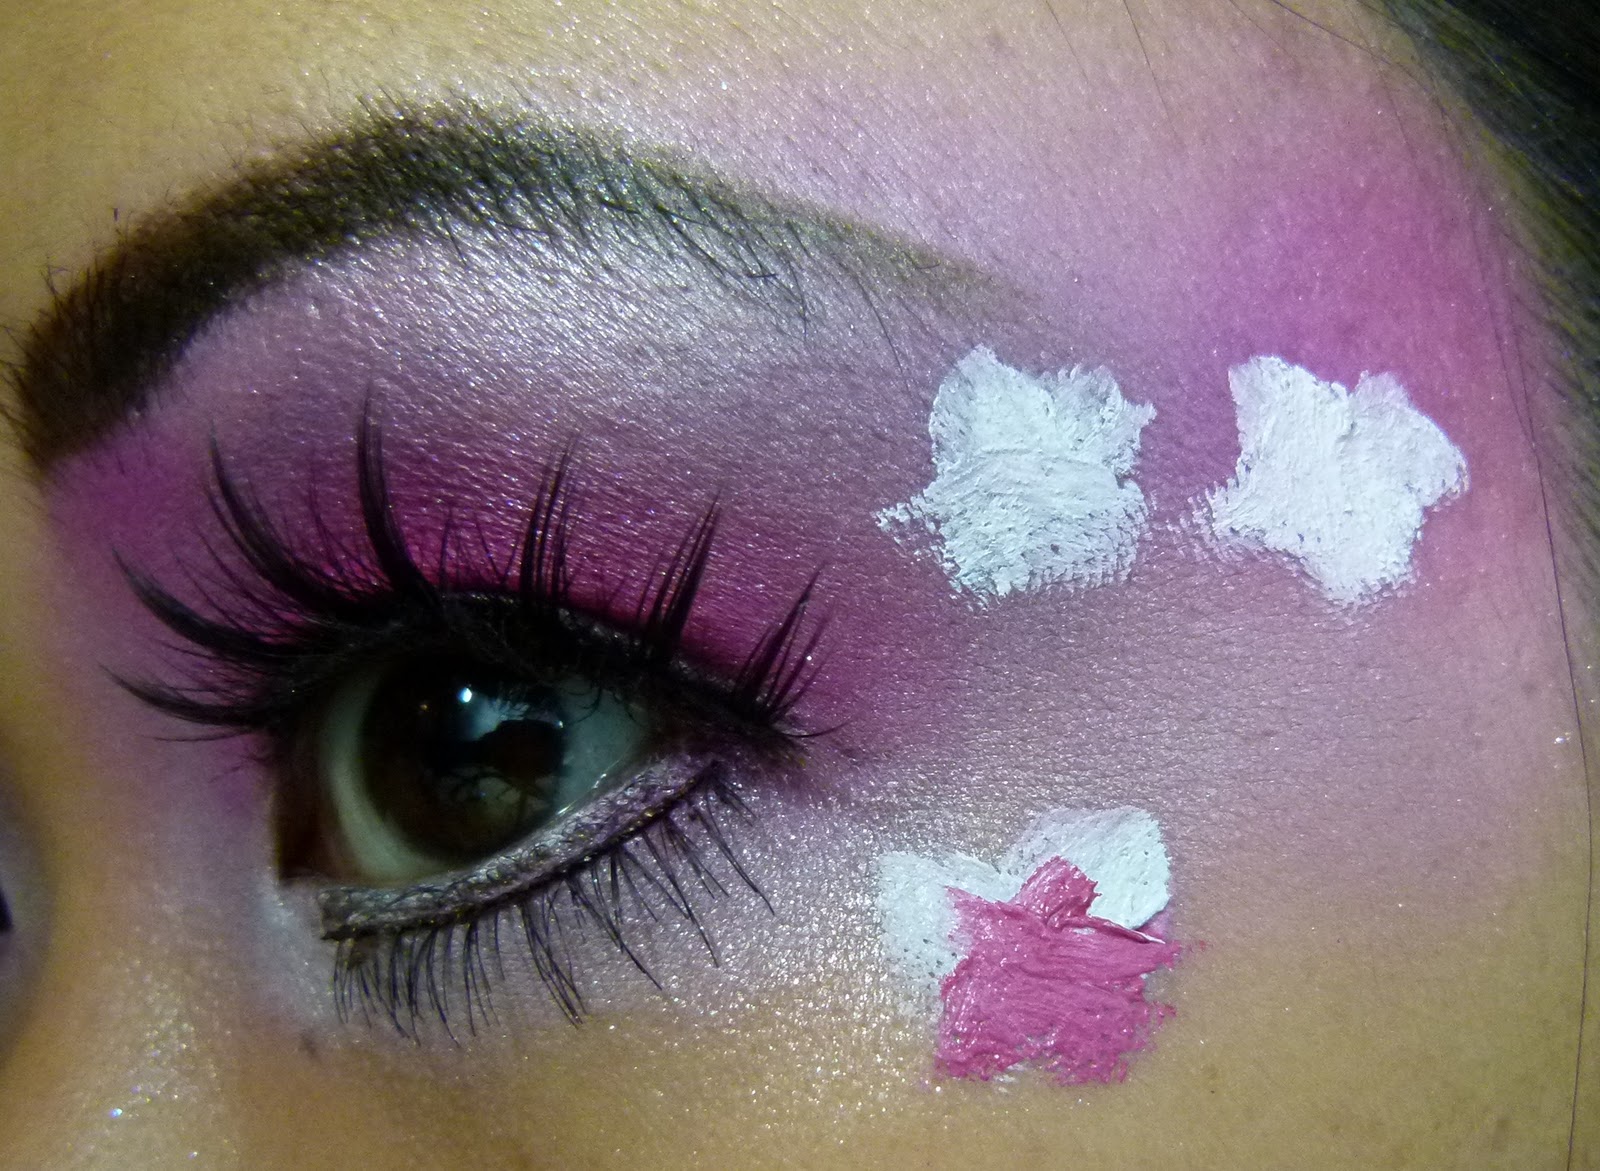
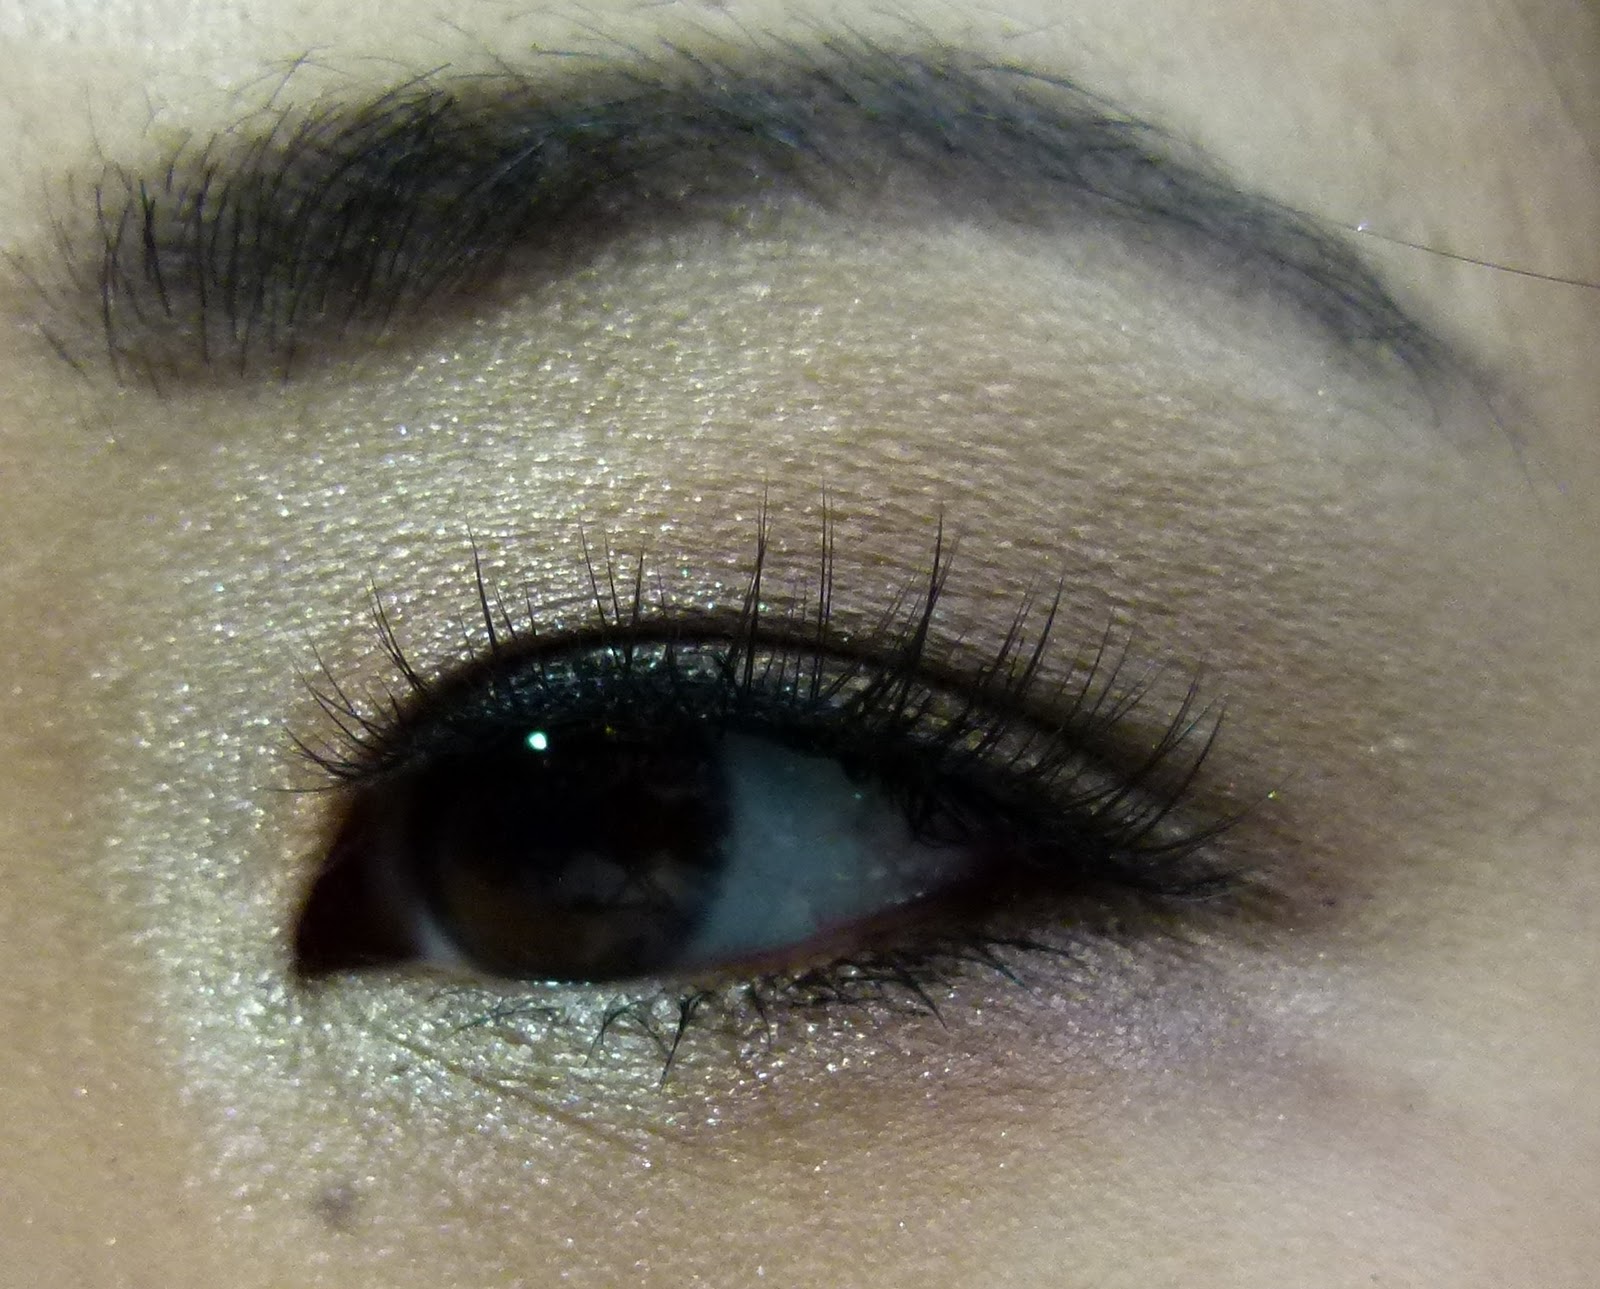
 10. Mascara and eyebrows!  I am using Giorgio Armani Eyes To Kill.
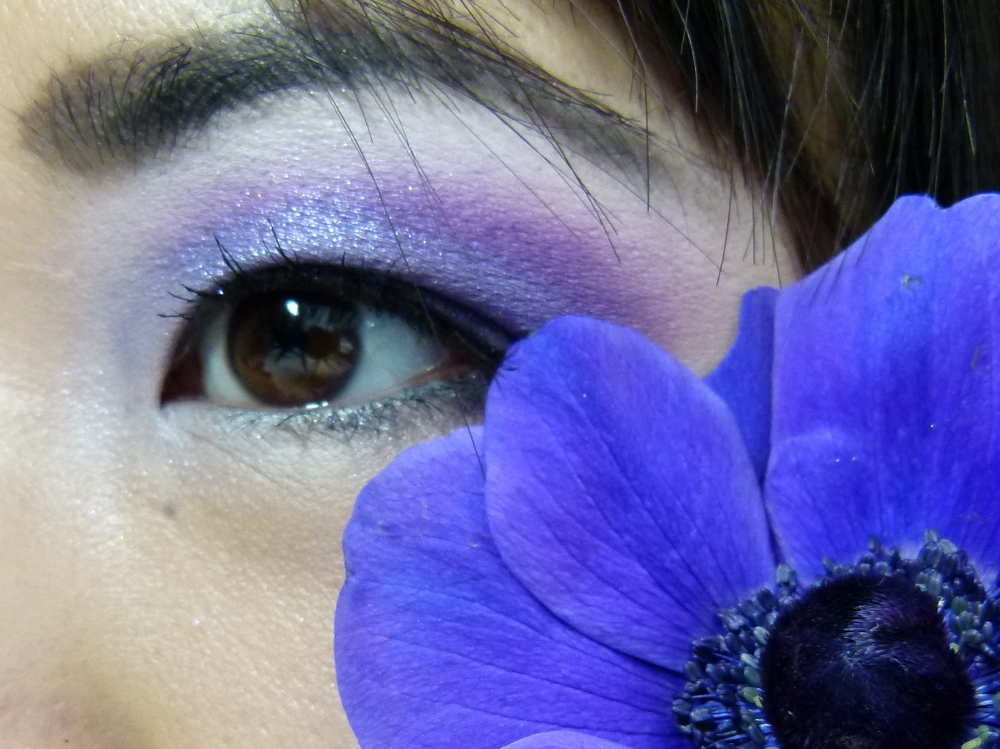
 You are done!  A spring inspired purple eye.

 I would wear this look in the day time.  Or maybe if I'm lucky enough, on a date with my hubs.
Happy Monday!!!!

All the Sugarpill products used here are available at www.sugarpillshop.com.  MAC Paint Pot in Soft Ochre is available at MAC counters nationwide, and Giorgio Armani Eyes To Kill Mascara is available at nordstrom.com.

What are some of your favorite spring flowers?  Or for any season?  I am still waiting for lilacs here!  Mmmm I love those!

Sakura Collaboration - Spring Cherry Blossom Eye Makeup Tutorial with Sugarpill Cosmetics

My finished sakura-themed look.  

I am thrilled about today's post.  Anna of Fenua Beauté and I were gushing about our love for Sugarpill cosmetics and had previously discussed how we are weak in the knees for any makeup product with incoperating the theme of sakura.  So, we decided over Twitter to collaborate to do a sakura-themed FOTD on our respective blogs using our favorite Sugarpill products.

In Anna's look, she paints delicate petals on the corners of her eyes.  Click here to see her look.  She looks ethereal!

I wanted to paint the actual blossoms on my face and extend the shadow to the hairline.  I think it would be awesome to bring this look to the next level and make it uber kawaii and outrageous.  But I wanted it to be somewhat wearable for most folks.  You can make this look more subtle by not taking the shadow out as far and limited the blossoms to one (or none). 

The Sugarpill products used.
See the step-by-step for details.  Above are Tiara (silver), Lumi (white) and Paperdoll (purple) loose eyeshadows.  The palette is 4-Color Palette in Sweetheart.  I used Dollipop and Tako pressed eyeshadows.  All products are available at sugarpillshop.com.  If you want to see a review of them, click here for the Sweetheart palette and here for ChromaLust Loose Eyeshadows.

Step 1: After you have put on your face makeup, prime your eye area (lid, undereye and to the temple) with an eyeshadow primer.  I used Nars Smudge Proof Eyeshadow Primer.
Step 2: To create a base, I mixed Inglot Duraline with Lumi ChromaLust Loose Eyeshadow.  Lumi is an irisdescent white with blue and green shimmer.  It is very sheer and makes a nice base for the eyelid.
Step 2 (cont'd): Cover the entire lid to the brow with this base.  Also apply to the lower lash line.  This will help hold color.
Step 3: Apply Dollipop at the crease.  Blend upwards.  Pack on extra color at the center of the eye for a pop of pink.
Step 3 (cont'd): Blend upwards and to the start of the eyebrow, creating a sort of Y shape.  Don't worry if this looks weird now.  You'll blend and mix later to soften edges and bring the look together.
Step 4: Where Dollipop ends, take Paperdoll and blend to soften the line.  Extend outwards towards the temple.
Step 4 (cont'd): Blend outwards towards to temple.
 Step 4 (cont'd): Keep going.... all the way to the hairline.
Step 5: Take a larger blending brush and dip in Dollipop.  From the hairline in circular motions create soft clouds of color towards the eye.
Step 6: With the same brush, dip in Tako and blend towards the eye.  Don't be afraid to go above the eyebrows or onto the tops of the cheekbone.
Step 7: Take Tiara on a clean brush and highlight the eyebrow and the inner corners of the eye, near the tear duct.  Using the same brush, apply Tako to the inner corners of the eye.
 Step 8: Blend Tiara to the eyeshadow in the temple.  Blend to make everything cohesive, but don't over-blend to muddle the colors.
Step 9: Line the waterline.  I used Stila Smudge Stick in Lionfish, a shimmering brown, vs. a black to keep the look soft.
Step 10: Line the bottom waterline with a white pencil.  I'm using Maybelline Unstoppable Eyeliner in Fluffy Cloud, a limited edition shade for Spring 2011.
Step 11: Apply top lashes.
Step 12: Apply bottom lashes for an extra doll-like look.  Define your brows.
Step 13: The fun part!  Painting the blossoms.  I'm using creme colors from Make Up For Ever's 12 Flash Color Case.  I mixed the white and fuchsia shades together to create the petals.
Step 13 (cont'd): Obviously, I'm not going for perfection here!  The petals can be more blobs, and then go in with another color to define.
Step 13 (cont'd): The smaller the brush the better.
Pretty petals!
Sakura! Spring is here!
Right eye (blossoms here are dotted with yellow and silver).
Go large or small on the petals.  No reason to just stop at 3.  Go above the eyebrow or onto the cheeks!

Thanks Anna for collaborating with me on this super fun project!  I had a great time doing it, and I hope it's one of many!

Do you like cherry blossoms?  Do go anywhere to see them? 

Michelle Williams At 83rd Annual Academy Awards - Makeup Tutorial Inspired by Michelle's Silvery Blue Undereye Liner Oscar Look!

Michelle's Oscar Night Look and My Inspired Version.

Close-up of Michelle's eyes.  More subtle use of silvery grey eyeliner.

My inspired look, a little more dramatic.  
We all can't have Chanel haute couture, so we gotta bling another way.

Here's another gorgeous look from Oscar night.  I love it when stars are brave enough to use color in their makeup for the red carpet.  Even though subtle, Michelle Williams wore a shimmering silver blue eyeliner on her bottom lashline.  I recreated a similar, but more dramatic look, here.

On my face, I am wearing Guerlain Parare Gold Radiance Foundation in 03 dusted with MAC Prep + Prime Transparent Finishing Powder.  On cheeks, Chanel Joues Contraste in Rose Dust.  Lips MAC Kissable Lip Color in Enchantee mixed with Mehr lipstick.

 1. Prime eye with Nars Smudge Proof Eye Primer.
 2. Inglot Duraline + Sugarpill Lumi ChromaLust Loose Eyeshadow creates a luminous white, blue/green iridescent base to hold onto color all night.
 3. Add lid color.  I'm using MAC Eyeshadows in Waft and Gentle Fume.
 4. Highlight inner corners of the eyes with shimmering white.  I'm using Rondelle eyeshadow by MAC.
 5. Line the lower lashline thickly with a grey blue pencil.  I'm using Chanel Precision Eye Define in Denim.
 6. Line the outer 1/3 of the upper and lower waterline in a grey pencil.  I'm using Laura Mercier pencil eyeliner in Stormy Grey.
 7. Add MAC Reflects Pearl pigment to the lower lashline.  Use a solution like MAC Mixing Medium to help adhere these tiny glitters to the eye area.  (Remember to use caution and read labels when it comes to glitters.)
 8. Curl lashes and add mascara.  I'm using Giorgio Armani Eyes to Kill.
 9.  Add false lashes and fill in eyebrows.  I used Bobbi Brown Gel Long Wear Eye Liner in Espresso Ink on my eyebrows.
A pretty look for your Blue Valentine.
Are there any Oscar winners or nominees that you haven't seen yet?  I have quite a few on my Netflix queue!

Natalie Portman Best Actress Makeup Tutorial - Makeup Look Inspired by Natalie Portman At The 83rd Annual Academy Awards Oscars

 Recreate Natalie's Oscar night look! 

Hello lovelies!  Yes, Oscar night is behind us now, but that doesn't mean we can't relive some of those fabulous red carpet moments with makeup looks inspired by some of our favorite stars.  It was great to see Natalie Portman go home with the Oscar.  Having followed her career for a long time and now to see her as a mom to be, I am thrilled that she went home with the Best Actress award.

Natalie's look from the red carpet.  Bronzey eye with soft lips and cherub cheeks.  Very elegant and composed without too much focus on one feature.  Just letting her radiant face shine through.

 I wish I had earrings like hers!

Here is my step-by-step tutorial on how to get this look inspired by Natalie Portman.  I prepped my face with MAC Strobe Cream to get a lit from within glow.  I primed my face with Make Up For Ever HD Primer in #6 and used Make Up For Ever HD Foundation in #125.  I dusted my face with MAC Prep & Prime Transparent Finishing Power.  For blush I used Make Up For Ever HD Blush in #6.  On lips I used MAC Dazzleglass Creme in Soft Dazzle.

 1. Prep eye with primer.  I used Nars Smudge Proof Eye Primer.  Then MAC Paint Pot in Bare Study on the lid and browbone.
 2. Line lower lash line from the inner corners to the center with a light champagne liner.
 3. Line the top lashline and lower outer 1/3 with a bronze pencil.  Line the upper waterline from the center to the outer corner only with a black waterproof pencil.

 4. Apply base soft brown shade.  I'm using MAC Rich Flesh Eye Shadow (Matte).
 5. Apply soft gold shade to the upper part of the lid.  I'm using RMK eye shadow in Shiny Brown Gold.
 6. Use a darker shade to cut a crease and work your way through the outer third of the eye.  I'm using Lancome Colour Design eyeshadow in 4Style.
 7. Blend, blend, blend.
 8. Apply a metallic shade to capture light and draw attention to the eye.  I'm using MAC Tan pigment.  Pack on the center of the eye.
 9. Add the same color to the outer third of the lower lashline, on top of where you put your bronze liner.  Smudge it out.   To create a more dramatic effect you can bring this portion to the tear duct and/or try using a darker eyeliner and then smudging it out.
 10. Curl lashes, apply mascara and lashes.  Draw your brows and you are done!
 Swatches of the products used.  Click to enlarge any photo!
  1. Smashbox Limitless Eye Liner in 14K
  2. Clarins Waterproof Eye Pencil in Bronze
  3. MAC eye shadow in Rich Flesh (matte)
  4. RMK Eyeshadow in Shiny Brown Gold
  5. MAC Tan pigment
I apologize because I know some of these products are LE or not available anymore, but it doesn't mean you can't get the same look with similar products.  Remember this is "inspired by!"  Just go with what you got!  Why try to be Natalie when you can be you! 

Get ready for your close-up because you are done!

Sally Hansen Salon Effects Real Nail Polish Strips - Laced Up - Tutorial - Our First YouTube Video!

Sally Hansen Salon Effects in Laced Up

New Year and new stuff at Beautyburg!  We created our first video on YouTube.  I had to create a video for Sally Hansen Salon Effects.  This is a drugstore version of nail polish strips, like Minx and Incoco.  The cost is $9.99, which is similar to other brands, but the advantage is that the distribution of Sally Hansen is much more accessable.

The reason I wanted to create a video tutorial for these was mainly because I had no idea how they worked!  I had never applied a dry nail polish strip before, so I thought that I couldn't be the only one.  I hope it's helpful!

 The box.

Sally Hansen Salon Effects come in a variety of shades and patterns.  There are neon shades, glitters and printed patterns.  Each box comes with 1 application and contains: a mini nail file, a cuticle stick and 16 nail polish strips. 

 The contents.

 
Prep: file and shape, then buff.

Wipe nails with nail polish remover.


 The finished product.

I personally found the process a little labor intensive.  For $9.99 for 1 application, you could go to a salon and get a manicure.  But I loved the funky patterns, and I received a compliment almost every where I went.  Sally Hansen claims up to 10 days of wear, but I found it was closer to 5 before tippage and peeling took over.   I would recommend this for a special occasion or if you want to try nail art without the hassle of Konading or attempting freehand. 


Watch our video here!

Do you think Sally Hansen Salon Effects are worth the effort?  Do you like patterned nail polish?  Would you like to see more videos from Beautyburg?